
Arguably, one of the most fulfilling things you can do as a jewelry lover, hobbyist or budding designer is learn how to create rings. A ring is tiny enough to complete in an afternoon, and every single technique you learn along the way — measuring, cutting, soldering, shaping, polishing — translates directly to every other kind of jewelry that will ever come from your hands.
How to Make Rings, This guide goes through all four primary methods of ring-making in use today, including wire fabricating, lost-wax casting, metal clay and CAD/3D printing. Whether you want to make your first ring at home with $50 worth of tools, or are looking into professional manufacturing options for a jewelry brand, the level of detail you require is in this post.
We have spoken to Reddit silversmiths, studied Quora questions from first-time ring makers, watched hours of YouTube and TikTok tutorials, and pulled from professional manufacturing experience at HonHo Jewelry — a Dongguan-based ring manufacturer with over 15 years of experience producing rings for global brands. The result is a guide that goes deeper than anything else currently ranking for this topic.
Table of Contents
- The 4 Main Methods for Making Rings
- Essential Tools for Ring Making
- The Ring Blank Size Formula (With Examples)
- Method 1: Wire Fabrication — Step-by-Step
- Method 2: Lost-Wax Casting — How It Works
- Method 3: Metal Clay Rings
- Method 4: CAD / 3D Printing
- Which Metal Should You Use?
- Adding a Stone: Setting Types Explained
- 7 Common Mistakes Beginners Make (and How to Fix Them)
- Scaling Up: When to Work with a Ring Manufacturer
- Frequently Asked Questions
- References
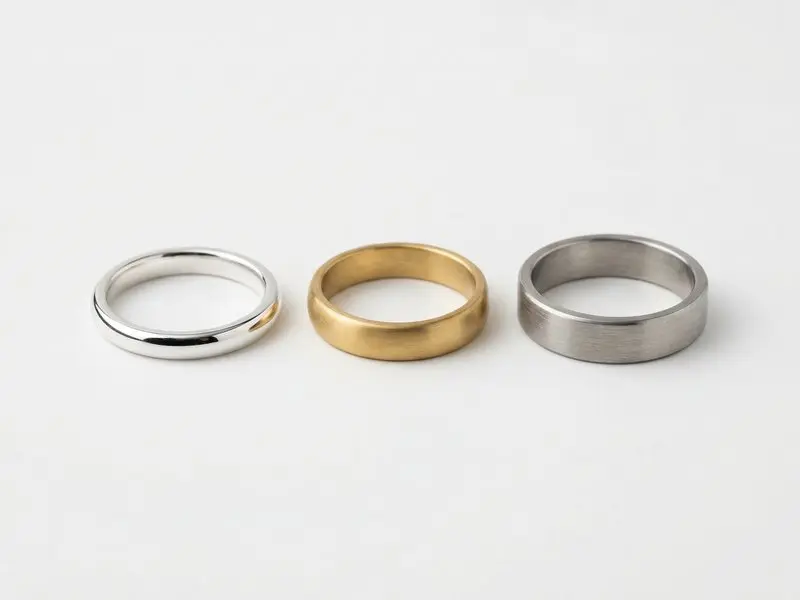
1. The 4 Main Methods for Making Rings
 1")
Before you buy a single tool, you need to choose an approach. Each ring-making method has its own learning curve, cost, and style of result. Here is a plain-language overview so you can pick the right path from the start.
| Method | Best For | Difficulty | Startup Cost | Metal Density |
|---|---|---|---|---|
| Wire / Sheet Fabrication | Beginners, simple bands, custom one-offs | Beginner–Intermediate | $50–$200 | High (dense, hard-wearing) |
| Lost-Wax Casting | Complex sculptural shapes, mass production | Intermediate–Advanced | $300–$1,500+ | Medium (slightly porous) |
| Metal Clay | Texture-heavy designs, no-torch option | Beginner–Intermediate | $30–$150 | Medium (sintered fine silver) |
| CAD / 3D Printing | Precision, reproducibility, brand collections | Intermediate–Professional | $500–$5,000+ | Depends on casting follow-up |
Manufacturer Insight: At the professional production level, rings are almost always made using CAD design followed by lost-wax investment casting, then hand finishing. This is what allows a factory like HonHo Jewelry to reproduce hundreds of identical rings from a single approved master design.
2. Essential Tools for Ring Making
The good news for novices: No fully stocked studio is required to create your first ring. The basic kit is compact and inexpensive. We asked the experts, along with members of Reddit’s r/SilverSmith community, what you really need and why.
Must-Have Starter Tools
- Ring mandrel — A tapered steel rod that is marked with ring sizes. For shaping, bending and sizing your ring. It’s more important than any other ring-specific tool you’ll buy.
- Rawhide or nylon mallet — To shape the ring on the mandrel and not leave hammer marks in the metal. At this point do not use a steel hammer.
- Jeweler’s saw and 2/0 blades — Provides a smooth, flat cut through wire and sheet metal. Hacksaws leave rough edges that are difficult to solder.
- Flat-nose and round-nose pliers — For bending and gripping the metal surface without damage. Get smooth-jaw versions to avoid marring your work.
- Half-round metal files (coarse and fine) — For burr removal, flatting of seam joint, and shaping band.
- Soldering torch — For most beginner soldering projects, a small butane jeweler’s torch will work. A propane torch is more powerful and better for larger work.
- Flux — Used to coat the seam before soldering to avoid oxidation and allow the solder to flow smoothly into the joint.
- Heart Solders (easy, medium hard) — First to hardest solder (highest melting point), you want us pull off a seam with second join on the same item.
- Pickle solution — A weak acid that removes fire scale and flux residue after soldering. Both Sparex No. 2 and plain white vinegar will do the trick.
- Steel bench block — A flat, hard surface for hammering and adding texture. Essential for getting clean results.
- Polishing cloth or compound — For that final shine. Tripoli compound is used to remove scratches; rouge compound brings a high mirror polish.
Nice-to-Have Tools (Add As You Grow)
- Flex shaft rotary tool (Dremel or Foredom) — For polishing, texturing, and drilling
- Ball-peen hammer — For hammered texture effects
- Bezel roller and pusher — To set stones
- Ring stretcher / reducer — For resizing completed rings without needing to re-solder
- Digital calipers — Important for accurately measuring wire diameter and ring blank length
It is easy on the budget: The average beginner starting wire fabrication can get started for about $100–$150 USD. Start by getting copper wire to practice — even though it’s not precious, copper is cheap and works almost like sterling silver when you work it.
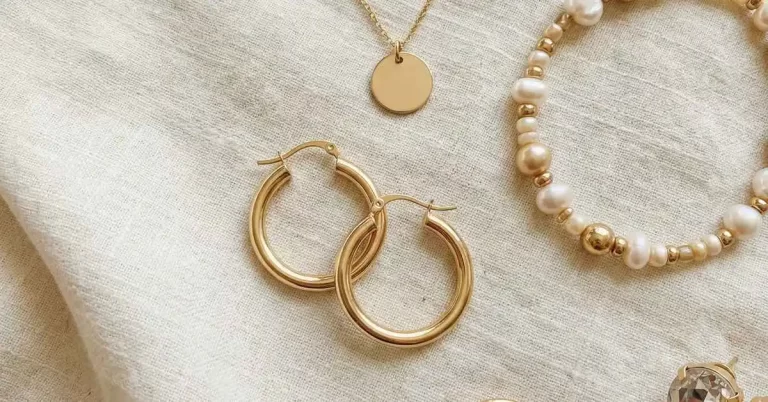
3. The Ring Blank Size Formula (With Examples)
 2")
This is the most crucial math you will perform in creating a ring. Getting the blank length correct before you cut and solder ensures that your end product hits your target size right off, without wasting metal or time to resize afterwards.
This formula is adapted from the professional ring blank calculator by Rio Grande and used by professional jewellers around the globe:
(Inside Diameter + Metal Thickness) × π (3.14159) = Ring Blank Length
You will find the standard inside diameter for every US ring size on any ring size chart. To make this concrete, here are a couple of worked examples:
| US Ring Size | Inside Diameter | Wire Thickness | Blank Length |
|---|---|---|---|
| Size 5 | 15.7 mm | 1.0 mm | (15.7 + 1) × 3.14 = 52.4 mm |
| Size 7 | 17.3 mm | 1.0 mm | (17.3 + 1) × 3.14 = 57.5 mm |
| Size 9 | 18.9 mm | 1.5 mm | (18.9 + 1.5) × 3.14 = 64.1 mm |
| Size 12 | 21.4 mm | 2.0 mm | (21.4 + 2) × 3.14 = 73.5 mm |
Pro Tip: Always make your blank 1–2 mm longer than the calculated length. The seam-filing step takes off a little material, and once you’ve cut something, you can only go shorter, never longer.
You’ll note that thicker wire makes a ring blank a little tighter on the inside, than the formula without exception indicates. This is because the wire bends around a much larger radius than the inner edge. Professional jewelers sometimes apply a minor correction — around one-half the metal thickness\* for very thick stock. For wire of a thickness less than ~ 2 mm, the simple formula above is sufficiently accurate.
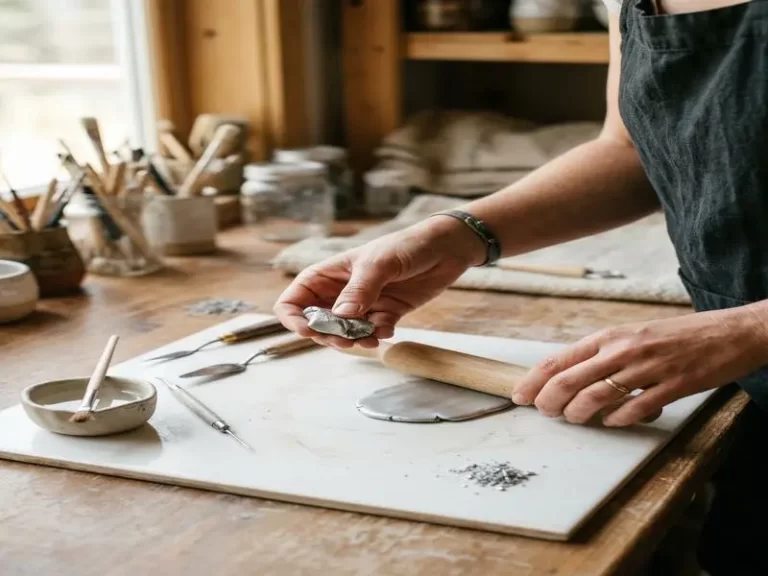
4. Method 1: Wire Fabrication — Step-by-Step
 3")
This is how to do rings the traditional old silversmithing way. Each step below is a real skill somehow applicable to more advanced projects. Once you’re comfortable, use sterling silver while using copper wire as your first cut.
What You Need
- Round wire: 18-gauge (1mm) sterling silver or copper
- Ring mandrel, hammer, jeweler’s saw, files
- Note: not easy to do at home and requires some skills.
- Pickle solution (Sparex or white vinegar), copper tongs
- Polishing cloth
Step-by-Step Instructions
- Straighten and clean the wire. Unroll the wire over a flat surface, and remove any kinks with smooth-jaw pliers or a nylon hammer. If using hardware-store copper, clean with acetone or isopropyl alcohol to eliminate any coating.
- Measure and cut the empty length. It’s Simply the above formula from Section 3. Inscribe the cut line with a sharpie. For a US size 7 ring using 1 mm wire: blank = 57.5 mm
- Cut with a jeweler’s saw. Clamp the wire into a bench vise or down against a bench pin. When cutting straight down use light strokes. Do not force the blade. A nice right-angle cut here leads you to a gapless seam down the line. A hacksaw or flush cutters leave a angled edge that is more difficult to solder.
- File both ends flat. The two ends of the blank that will hit up against to seam must be perfectly flat and parallel. A flat file over a bench block. For a test, hold the ends up to some sort of light source — no light should come through the joint.
- Anneal the wire. Using the torch, evenly heat the wire until it starts to glow a very faint dull red. This process softens (anneals) the metal so it can be easily bent without tearing. Quench in water, then immerse into a pickle solution (2–3 minutes) to remove oxidation. Rinse with water.
- Bend into a ring shape. Create the bend using round-nose pliers and then complete around- the-ring mandrel. This is done with the ends that have been filed and should meet at 0 visible gap. Should you notice a gap, close it up by gently squeezing with smooth-jaw pliers until the seam closes. The ends should be spring-fit in opposing directions.
- Solder the seam. Use a small brush to apply flux in the seam area. Set a pinhead of easy-grade silver solder directly on the seam joint. If using a torch, heat the whole ring evenly until the entire piece is at temperature, then bring your flame to bear on the seam. Observe the solder as it melts and is drawn into the joint by capillary action. Hotter is not better — solder must flow, it shouldn’t bead up.
- Pickle again. Pickle for 5 minutes to remove flux residue and fire scale. Only use copper tongs — steel will poison the acid and plate your silver pink.
- Round on the mandrel. Using a rawhide mallet, place the ring on the mandrel and tap lightly around the band while rotating. As a result, the circle is as perfect as possible and scaled to size. Slide the ring down slowly on the mandrel — you can always size up by pounding further down.
- File and sand the seam. Use the half round file to remove any solder line visible. Then sand with 220, 400 and 600 grit paper to smooth. At each grit stage, work in one direction before progressing to the next.
- Polish. Use a polishing cloth” with rouge compound, or a rotary tool “with a polishing wheel. Buff in circular motions to desired finish — satin, brushed or high-mirror gloss.
(Optional Hand-Hammered Texture: Before the final polish, put your ring back on the mandrel and with a ball-peen hammer tap evenly all around. This leaves a gorgeous hammered surface texture and lightly work-hardens the metal. The ring will expand a bit as you check out the hammering so if you want an exact fit, then size it one half-size smaller before hammering.
5. Method 2: Lost-Wax Casting — How It Works
Lost-wax casting is one of humanity’s oldest metalworking techniques, dating back more than 6,000 years; it continues to form the backbone of most commercial ring production today. This is the method for making sculptural shaped rings not able to be fabricated from flat metal, or multiples of the same design.
The 9-Step Lost-Wax Casting Process
- Model making. Design and sculpt a model of the ring in jeweler’s wax, utilizing wax carving tools (files, scalpels, wax burs). The wax model is the same shape and size as your finished ring — it will eventually be replaced by metal.
- Make a rubber mold (for multiples) The wax model forms a rubber mold for forming. Liquid rubber is then vulcanized around the master, creating a flexible mold that can be used to inject dozens of identical wax copies.
- Produce wax patterns. Molten wax is poured into the rubber mold. Each injection makes one copy of the original design.
- Build a wax tree. Wax copies are connected to a central wax “sprue,” forming a tree-like structure. This creates routes for the metal to flow into every void when casting.
- Investment (flask). The wax tree is then inserted into a steel flask and surrounded by liquid investment plaster. You give time for the investment to settle.
- Burnout. The flask is then loaded into a kiln and heated to 700–900°C; the wax completely burns out (or melts out), resulting in an exact negative cavity inside the plaster. This is the “lost” wax step.
- Casting. Liquid metal (such as silver, gold, brass or stainless steel) is poured in or forced in centrifugally into the cavity. The metal penetrates every detail of the original wax model.
- Devesting. After that, the plaster flask is then quenched in water to cool down the metal. The plaster then is dissolved to expose the metal casting tree. They cut individual rings with a saw from the tree.
- Finishing. Each ring is filed, sanded, stone-set if needed, polished and quality-checked before it ships.
Fabrication vs. Casting: Which is Better?
This is one of the most debated topics on Reddit’s r/jewelers and r/SilverSmith communities. The honest answer is: neither is better — they are different tools for different goals.
| Factor | Fabrication | Lost-Wax Casting |
|---|---|---|
| Metal density | Higher — metal is worked and compressed | Lower — slight porosity from casting |
| Wear durability | Better for long-term daily wear | Wears faster; better with harder alloys |
| Design complexity | Limited by what can be cut and folded | Almost unlimited sculptural freedom |
| Reproducibility | Each piece is unique (slight variations) | Identical copies from one master mold |
| Time per unit | Hours per piece | Minutes per piece once mold exists |
| Labor cost at scale | High | Low (ideal for wholesale) |
6. Method 3: Metal Clay Rings
Metal clay is made of a whole lot of small metal particles (usually fine silver. 999, gold or bronze — suspended in a binder of organic origin. You sculpt it, like any clay, let it dry and then fire it with a torch or in a kiln.” The binder burns out, and the metal powders sinter into solid metal.
Metal clay is appealing for beginners because it requires no soldering, no saw, and no mandrel — at least for the shaping step. The main product lines are:
- Metal clay is attractive for newcomers because it needs no solder, no saw with blades and no mandrel — at least the shaping step. The main product lines are:
- PMC (Precious Metal Clay) — Fine silver clay with different formulations including PMC3 and torch firing
- Art Clay Silver — Also a good fine silver clay brand, fine silver. 999 when fired
- Non-Precious and Precious Options: Bronze Clay, Copper Clay, Gold Clay
How to Make a Metal Clay Ring (Basic Steps)
- Cover a ring mandrel with multiple layers of plastic wrap or tape (the ring will get smaller 8–15% during firing, so size up accordingly)
- Using a roller and thickness guides roll the clay to 2–3 mm thick
- 2: Cut an strip WIDE enough for your desired ring band, and LONG enough to wrap around the mandrel at your ideal size + ~12% extra for shrinkage
- Form the strip around a mandrel, sealing its ends with water or fresh clay slip.
- Let dry thoroughly (at least 30 minutes with a hair dryer, or air-dry overnight)
- Carefully remove from mandrel and polish surface with fine sandpaper or a metal file
- Fire the piece with a butane torch (hold at dull-orange glow for 2 minutes) or in a kiln according to manufacturer instructions
- Quench, then burnish with a metal brush and polishing cloth to restore the silver finish
IMPORTANT Sizing Note: Fine silver metal clay shrinks 8–15% in firing. This means you need to make the ring 1–2 sizes bigger than your desired size. Do a test shrinkage on a scrap piece first. Different clay formulations shrink at different rates — check the specific brand’s technical sheet, always.
The final piece of metal clay will eventually be fine silver (92.99% pure) when fired, whereas 926 silver is only ~92.5% silver—hence why your metal clay jewelry can be classified as fine silver. 999) — more pure than sterling but softer and more susceptible to bending than a fabricated sterling ring. Metal clay rings are more appropriate for occasional wear or textured elements of design.
7. Method 4: CAD / 3D Printing
Computer-aided design (CAD) at the professional level has revolutionised ring making. Rather than hand-carving wax, designers create an accurate 3D digital model in programs including Rhino, ZBrush or Jewelry CAD Dream and then 3D print a castable resin pattern — which can then be cast the same way a wax model is via the lost-wax process.
For brands designing collections at scale, CAD drops in design details that are physically impossible to carve by hand: stone spacing in perfect pavé format; engraved text down as small as 0.2 mm; filigree networks; and complex geometry.
The CAD-to-Ring Workflow Used by Professional Manufacturers
- 3D model the design in jewelry CAD software (Rhino, Matrix, ZBrush etc.)
- I usually export STL file and print in castable resin with SLA or DLP 3D printer
- They can then be attached to a sprue tree and invested in a plaster flask
- Burn it in kiln — resins vaporize clean, like wax
- Centrifugal or vacuum cast in molten metal
- Dévest is a papermaker who cuts each tree and hand-finishes each ring
The great advantage over conventional wax carving is that the digital file remains intact. You can recreate the exact ring months or years later, customize it digitally or resize it for a different finger — all without having to begin from scratch.
For Brand Owners: If you are building a jewelry line and want professional-quality rings without setting up your own factory, working with a manufacturer like HonHo Jewelry gives you full CAD design services, wax model approval, and mass production under your brand. You retain the design files and can reorder or modify at any time.
8. Which Metal Should You Use?
The metal you choose affects workability, cost, durability, and whether your ring is hypoallergenic. Here is a practical comparison for ring makers at every level:
| Metal | Best For | Difficulty to Work | Cost | Tarnish Risk | Hypoallergenic? |
|---|---|---|---|---|---|
| Copper | Beginner practice | Easy | Very low | High | No |
| Sterling Silver (.925) | Most handmade rings | Easy–Medium | Moderate | Moderate | Generally yes |
| Fine Silver (.999) | Metal clay, delicate work | Easy (too soft for daily wear) | Moderate | Low | Yes |
| Brass | Budget jewelry, plating base | Easy | Low | High | Sometimes (can contain zinc) |
| Stainless Steel | Durable daily-wear rings | Hard (requires CNC/casting) | Low | Very low | Yes (316L grade) |
| 14K / 18K Gold | Fine jewelry, heirloom pieces | Medium | High | Very low | Varies by alloy |
For beginners, the recommended progression is: copper → sterling silver → more complex alloys. Sterling silver behaves like copper but produces jewelry you can actually wear and sell. If you are manufacturing rings for a brand, stainless steel and 925 sterling silver are the two most popular production metals — stainless for durability and price, sterling for the premium finish and hallmark credibility.
HonHo Jewelry produces rings in all of these metals, including stainless steel rings, 925 sterling silver rings, and brass rings for wholesale brands.
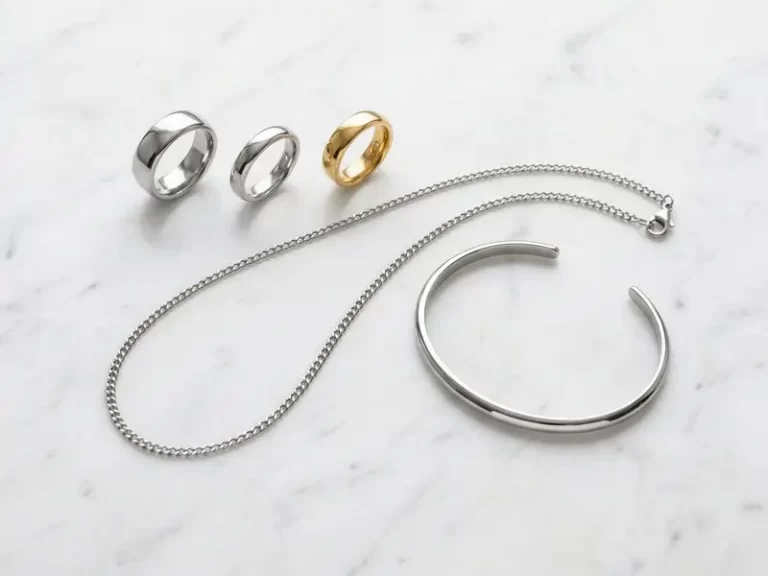
 4")
9. Adding a Stone: Setting Types Explained
The next logical thing after you can make a clean band is to add a gemstone. Setting stones is an advanced skill, but knowing the main setting types lets you design for purpose from day one.
- Bezel setting — A strip of metal (the bezel) is shaped around the stone’s perimeter and pressed over its edge to secure it. This is the easiest setting for new beadmakers because it doesn’t require precision drilling and offers good protection for fragile stones. Great for cabochons (flat-bottomed stones).
- Prong (claw) setting — Metal claws support the stone from the side, giving maximum light exposure through the gem. Popular for faceted stones such as sapphires and diamonds. Needs more accuracy than bezel setting.
- Tension setting — With no bezel or prongs, the stone is retained by pressure from the band itself. There are metal working techniques to achieve this through grinding, but it is technically demanding; arguably best left to experienced smiths or utilizing CAD manufacturing.
- Pavé setting — A multitude of small stones set flush with the metal surface, held in place by tiny prongs or beads of metal pushed up around them. Requires specific tools, and has a rather high skill cap; can almost always done via casting in commercial manufacturing.
- Flush / gypsy setting — The stone is flush with the metal surface, set into a drilled seat. Minimal profile; very secure. Okay for rings that could experience trauma.
ZIP 1: Start with a bezel-set cabochon ring All you need is a bezel mandrel, a bezel pusher (which looks like a fork), and a flat tool. Select a stone that has a flat, polished base (turquoise, labradorite and moonstone are favorites for this). YouTube channels on silversmithing — including Chad’s
10. Seven Common Mistakes Beginners Make (and How to Fix Them)
These are the mistakes that new people always seem to make on Reddit, or in YouTube comments — and they’re all completely reversible once you know what to look out for.
- Leave a gap in the seam before soldering. Solder flows by capillary action — it will not fill a gap, only a perfectly touching joint. If you notice an opening, pinch the ring with smooth pliers until both ends meet. Put it in a good light before you grab the torch.
- Overheating one spot. Most beginners aim the torch directly at the seam. Instead, evenly heat the whole ring, then go to the seam at the end. Intense heat generates firescale and warping. With a small ring, the entire band must be up to temp before solder flows.
- Not using enough flux. Flux prevents oxidation during soldering. If you apply too little, the metal surface oxidizes before the solder can flow to create a dirty joint. Coat the seam area with the brush before heating.
- By the Pickle Pot with Steel Tongs You use steel and acid to plate a pink copper film on your silver. Only use copper, brass, or plastic tongs with pickling acid.
- Rounding on the mandrel too heavily. Tapping too enthusiastically on the mandrel rapidly work-hardens the ring and can produce a bumpy surface. Do not use a steel hammer for rounding — only a rawhide or nylon mallet.
- Cutting the blank too short. You cannot add metal back. Use the formula in Section 3, round up by 1–2 mm then check your mandrel before soldering.
Polishing through the ring. Polishingover at the seam area can wear off the metal at that position. Work square inches at a time and make sure to check your progress often. A one millimeter ring could be reduced to a 0.5 millimeter WIDTH at the seam with vigorous polishing.
11. Scaling Up: When to Work with a Ring Manufacturer
At some point, if you are serious about building a jewelry brand, handmaking every ring yourself stops making financial sense. The tipping point varies, but most jewelry entrepreneurs start thinking about manufacturing when they are making more than 30–50 of the same design per month.
Working with a professional ring manufacturer like HonHo Jewelry means your designs are produced using industrial CAD/CAM and lost-wax casting, finishing to the same standard as luxury brands, but at wholesale pricing. The process generally works like this:
- Design brief. You provide a sketch, reference image, or CAD file. HonHo’s design team builds a precise 3D model in jewelry CAD software.
- 3D preview and approval. You review a rendered 3D image of the ring before anything is physically made.
- Sample production. A physical sample is cast and finished in your chosen metal. You can request adjustments before approving production.
- Bulk production. Once you approve the sample, rings are produced in your specified quantity, metal, plating, and ring sizes.
- Quality control and shipping. Every batch goes through QC against your spec before packing and shipping.
Typical minimum order quantities start at 50–100 pieces per design. Metals include 925 sterling silver, stainless steel (304 and 316L), brass, and gold-filled. Plating options include gold (14K, 18K), rose gold, rhodium, and black rhodium.
Looking to produce custom rings for your brand?
HonHo Jewelry offers full OEM/ODM ring manufacturing services — from initial design to finished, packaged product — for jewelry brands worldwide.Learn About Our Manufacturing Services
Frequently Asked Questions About How to Make Rings
How does one create a ring for the novice?
Wire ring fabrication is the simplest way to start learning how to get into jewelry making. Use 18-gauge sterling silver or copper wire, and use the formula (inside diameter + wire thickness) × 3.14 to calculate how long your blank needs to be, then cut it and file both ends flat before annealing and bending it around a mandrel, soldering the seam closed before rounding off to shape and polishing. Copper wire is perfect for a first try — relatively inexpensive, soft, and it works like silver. When they first ring, it’s usually in a 1-day class/tutorial session.
How do I make rings at home safely?
The essential tools are: a ring mandrel; rawhide mallet; jeweler’s saw and 2/0 blades; flat-nose pliers; round-nose pliers; half-round files; butane torch; flux; easy-grade silver solder (for joining pieces of metal); pickling solution (if you’re working with copper or other metals that require cleaning after soldering) while holding it in your mouth so you know where it is at all times); bench block/polishing compound. It costs around $100–$150 USD for a basic setup. Add a flex shaft rotary tool, digital calipers, and ring stretcher/reducer as you move along.
What metal is best suited for at home ring making?
Copper is the most beginner-friendly, since it’s inexpensive and soft, and acts just like silver. When you get the hang of it, go for sterling silver (. 925), which is also the standard for handmade rings. Avoid fine silver (. 999) over ring bands — it is too malleable to keep its shape with everyday use.
I need to know how long the ring blank needs to be.
Formula — Ring Blank Length = (Inside Diameter + Metal Thickness) × π (3.14). (17.3 + 1) × 3.14 = 57.5 mm for a US size 7 ring with a wire of 1 mm. Always measure 1–2 mm longer than the final size and file to fit. A similar process works for round wire and flat sheet.
What distinguishes fabrication from lost-wax casting?
Fabrication crafts the ring by hand — cutting, bending and soldering metal together piece by piece. The result is tough, hard-wearing metal. Lost-wax casting begins with a wax model that is invested in plaster, burned out and then filled with molten metal… Casting is better than fabrication at making complex sculptural shapes and in mass production, but cast metal is a fraction softer and more porous.
Is it possible to make rings without any soldering procedures?
Yes. There is no heat involved in wire-wrapping. Fired in a torch or kiln, metal clay fuses; no solder required. Techniques to make cold connections, like riveting and tube settings also do well without a torch. These techniques are perfect for total novices or others unable to safely use a flame in their home.
Before that, they had a collective average of an hour or two on how to make rings.
A simple wire band ring is one of the ones you can get done most easily in your 1-day introduction class. 4–8 weeks of consistent practice sufficiently develops basic soldering and sizing skills. Things like stone setting and professional finishing often take 6–12 months. The best advice from silversmiths who have come before me on Reddit is to take one class before investing in tools and to make dozens of rings in copper before transitioning into silver.
How a professional jewelry manufacturer produces rings at scale?
The standard workflow is a CAD design, which builds into a 3D printed resin pattern, followed by lost-wax investment casting and hand finishing (filing, stone setting and polishing), plating and then QC. This enables a factory like HonHo Jewelry to produce and reproduce hundreds of identical rings from one approved master. The digital CAD file remains on file for a reorder or edit.
What gauge of wire is best to use when making rings?
18-gauge (1.0 mm) round wire is the go-to starting gauge for band rings. Use 16-gauge (1.3 mm) or thicker for wider bands, and rings that are subjected to daily wear. If you are making delicate stacking rings or undertaking wire-wrap work, then 20–22 gauge (0.6–0.8 mm) is better suited for the job. As a general rule, the thickness of wire should always be matched to its intended use and frequency of wear.
How to order a custom ring from the manufacturer
To order custom rings from HonHo Jewelry, you provide your design (sketch, image, or CAD file), specify the metal, plating, stone requirements, ring sizes, and quantity. The factory creates a 3D CAD design for your approval, produces a physical sample, and then moves to bulk production. Minimum orders typically start at 50–100 pieces per design. You can contact HonHo directly via www.honhojewelry.com to request a quote and sample.
Final Thoughts
Learning how to make rings is one of the most satisfying creative skills you can develop. Start simple — a plain copper band with a clean soldered seam is genuinely impressive the first time you make one. Every technique you pick up along the way stacks on the last one, and within a year of consistent practice, you will be capable of work that surprises even experienced jewelers.
If your goal is to build a ring product line at scale rather than make rings yourself, working with a reliable manufacturer is the smart move. At HonHo Jewelry, we have helped hundreds of brands bring ring designs from a sketch to a finished, packaged product ready to sell. Our team handles the CAD design, sample making, bulk production, and quality control — so you can focus on building your brand.
Whether you are hammering your first copper ring at the kitchen table or finalizing a wholesale production run, the core of ring making is the same: respect the metal, measure twice, and never rush the seam.
References
- GoMeow Creations. “How to Make Your First Ring at Home — Beginner Jewelry Making with Basic Tools.” (2025). https://www.gomeowcreations.com/blogs/free-jewelry-making-tutorials/how-to-make-your-first-ring-at-home-beginner-jewelry-making-with-basic-tools
- Reddit r/SilverSmith. “What’s a realistic roadmap for starting silversmithing?” (2026). https://www.reddit.com/r/SilverSmith/comments/1jusewf/whats_a_realistic_roadmap_for_starting/
- Formlabs. “Lost-Wax Casting: Technique, Process, and Applications.” https://formlabs.com/blog/lost-wax-casting/
- SkyJune Studio. “The Most Common Mistakes Beginners Make in Metalsmithing.” (2025). https://skyjune.com/blogs/blog/the-most-common-mistakes-beginners-make-in-metalsmithing-and-how-to-fix-them
- HonHo Jewelry. “Manufacturing Services.” https://www.honhojewelry.com/services/
- Rio Grande. “Professional Ring Blank Sizing Calculator.” (2022). https://www.riogrande.com/knowledge-hub/ring-blank-sizing-calculator/
- YouTube — Chad’s Silversmithing. “Making Three Basic Silver Rings for Beginners.” https://www.youtube.com/watch?v=IWC7QYvo6us
- The Bead Shop UK. “Complete Guide to Creating Your Own DIY Rings.” (2023). https://www.the-beadshop.co.uk/beads-jewellery-making-blog/jewellery-making-tips-and-advice/complete-guide-to-creating-your-own-diy-rings/
Best Costume Jewelry in 2026: Brands, Materials & Care Guide
HonHo Jewelry is a custom jewelry manufacturer based in Dongguan, China, with 15+ years of
Silver Clay: The Complete Beginner’s Guide to Making Real Silver Jewelry at Home
All you need to turn your bare hands into real silver from scratch are a
Is Stainless Steel Good for Jewelry? The Full Guide (2026)
Is stainless steel good for jewelry? Walk into any jewelry store today — or scroll