
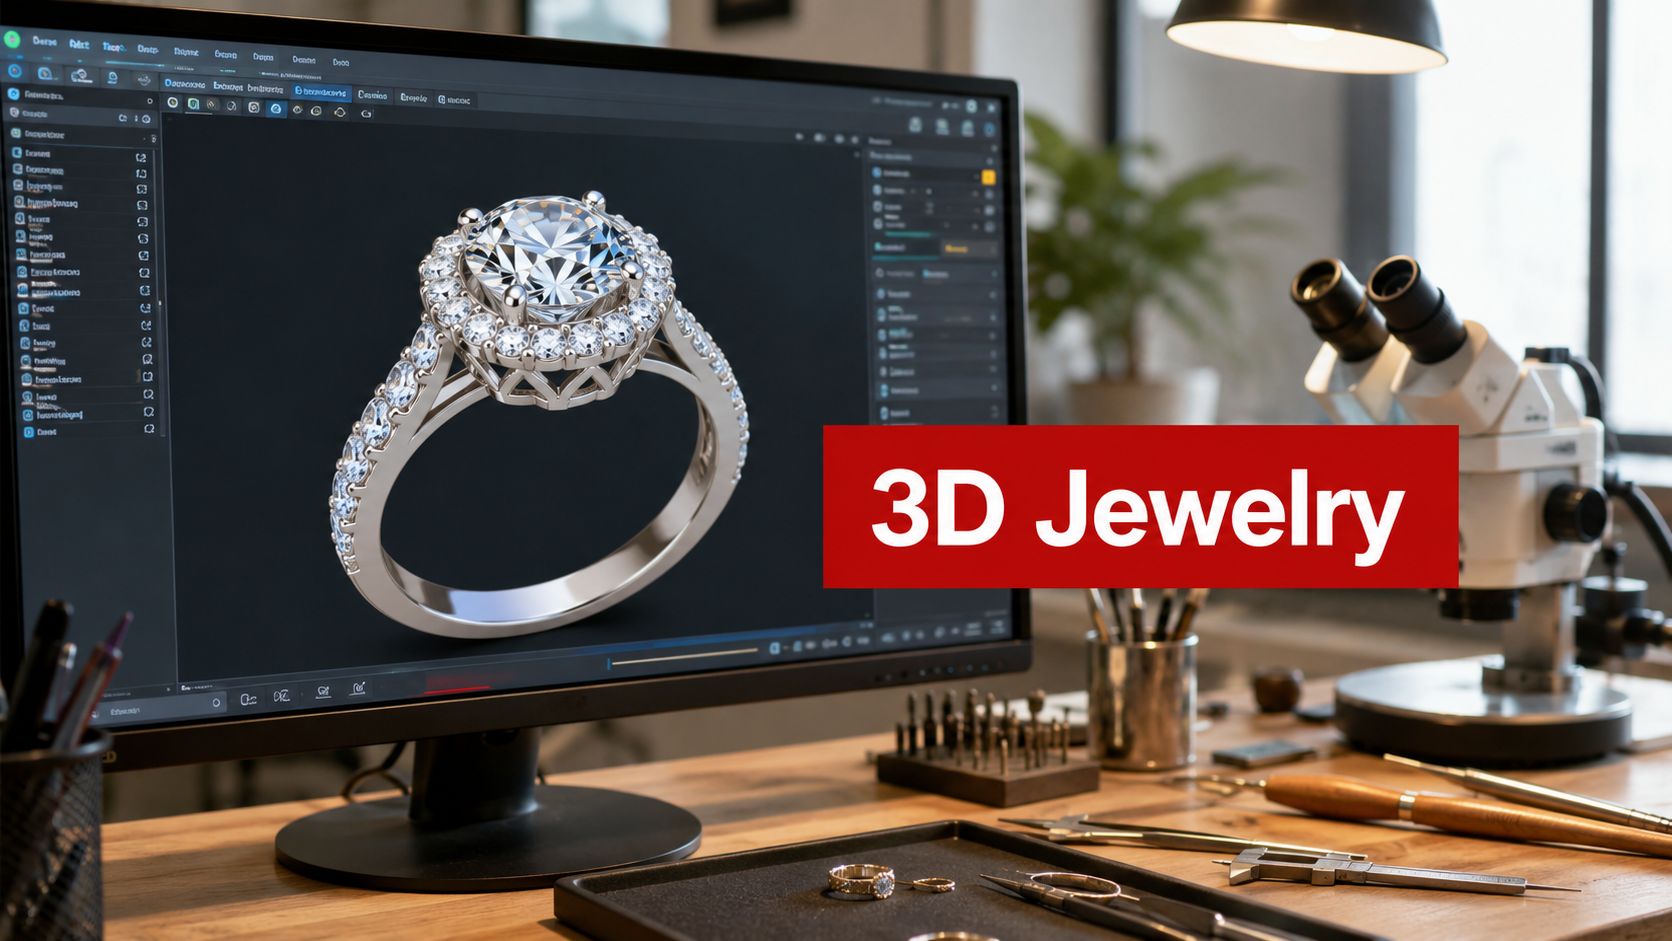
You’ve got a sketch on one screen, a rough sample deadline on the other, and a buyer asking whether the ring will still look right once the stone size changes. That’s the exact moment 3D jewelry rendering becomes useful. It gives you a way to see the piece, judge the proportions, and align design, sampling, and production before anyone casts metal or sets a stone.
What 3D Jewelry Rendering Means for Modern Brands

A clean way to think about 3D jewelry rendering is this. A designer builds the piece in CAD, then specialized software turns that geometry into photorealistic images, spin views, or interactive assets that buyers and merchandisers can review. The output isn’t the same as a photo shoot. It’s a digital asset set made from measured geometry, controlled lighting, and material settings, so the ring, pendant, or bracelet can be reviewed before production starts.
That matters because jewelry is sold on visual confidence. The market for jewelry 3D rendering was valued at US$93.2 million in 2025 and is forecast to reach US$366.3 million by 2033, with 19% CAGR over that period, which shows the workflow is becoming commercially important rather than experimental (Grand View Research). North America is identified as the largest revenue-generating region in 2025 in that same snapshot, which fits what many OEM and ODM teams already see, mature e-commerce and luxury buyers want strong visuals early.
What brands actually receive
A project can produce a hero image, additional angles, marketplace-ready views, AR-ready assets, and campaign visuals. The important point is that one render is rarely enough. Buyers often need a front-three-quarter hero view plus side and top views, because those angles reveal setting height, gallery structure, clasps, or stone lines more clearly than a single polished image can.
If you want a concise glossary-level explanation, the BlitzReels glossary guide is a practical place to start. For a buyer building a brand from scratch, the bigger business question is how the render fits into launch planning, which connects directly with this step-by-step jewelry business starter guide.
Plain rule: if the image can’t help a buyer understand the shape, finish, and stone placement, it’s decoration, not production support.
Why Brands and Manufacturers Rely on 3D Rendering

A buyer approves a ring line from a monitor before the first silver sample is cast. A merchandiser checks whether a pendant reads clearly in a catalog crop. A production team wants to know if the stone seats, prong height, and plating finish make sense before anyone spends money on metal. That is where 3D jewelry rendering earns its place in the OEM and ODM process.
The strongest reason brands use rendering is simple. It helps them sell and approve products before physical samples exist. That makes it useful for DTC labels that want to test concepts quickly, for wholesalers that need consistent catalog images, and for designers who want to show a concept before committing to tooling.
The commercial case is already visible in e-commerce. One industry report says brands that moved from static photography to interactive 3D + AR visualizers saw conversion rates rise from 1.9% to 11.2%, return rates fall from 41% to 9%, and average order values increase from £680 to £3,180 (Chasing Illusions). Those figures matter because they show how visual clarity can change buyer behavior, especially in a category where small details influence confidence.
The manufacturing side has its own case. A 2022 study on virtual-reality-based jewelry design reported that using a digital 3D model as the design carrier reduced the average product loss rate to 5.523% versus 8.043% and 8.237% for two comparison methods (Wiley). That points to a practical truth. When the digital model is accurate, teams revise earlier and waste less material later.
Why the workflow changes the business
A render used to be treated like a marketing image. Now it often acts like an approval checkpoint. That shift matters because the same file can help design, merchandising, and production teams stay aligned before a mold is cut or a sample is approved.
The useful render is the one that prevents a bad sample, a weak listing, or a late revision. A polished image that ignores stone height, plating tone, or clasp shape may look attractive and still fail the line review. A cleaner workflow usually starts with CAD discipline, then moves through rendering, then into sampling and QC, so each handoff carries the same design intent.
Strategic shift: the useful render is not the prettiest image, it’s the image that prevents a bad sample, a weak listing, or a late revision.
If you are comparing outside providers, it helps to choose a rendering studio wisely, especially when your line includes multiple SKUs, stone options, or plated finishes. For brands with tight launch calendars, that choice can decide whether a collection reaches market cleanly or keeps cycling through revisions.
The Typical 3D Jewelry Rendering Workflow

The workflow starts with a brief, not with software. A buyer shares sketches, reference photos, gem sizes, finish preferences, and the target customer. The modeler then turns that brief into CAD geometry for the stones, settings, shanks, clasps, or chains.
From CAD to the render room
Teams work in tools such as Rhino, Matrix, ZBrush, or Blender for modeling, then move into KeyShot, Blender Cycles, V-Ray, or LightTracer for rendering. The software stack matters less than the discipline behind it. Clean geometry, correct scale, and sensible scene setup drive the result far more than a brand name on the toolbar.
Once the CAD is ready, the model gets cleaned up, the scene is assembled, and materials are assigned. Lighting comes next, and that stage usually takes longer than buyers expect because jewelry reacts to small changes in reflection and shadow. Test renders catch problems before the final output, which is where revisions usually happen.
What the client sees
A good manufacturer won’t send one image and call it done. It will usually share draft views, ask for corrections, and then finalize the hero shots, additional angles, or animation frames. That back-and-forth is normal, not a failure. It’s how the buyer and the maker keep the piece aligned before sampling.
A 2025 process guide states that most single-piece jewelry rendering projects take 3 to 7 working days from sketch to final render (Zealous XR). That timeline makes sense when you remember that every change to a prong, stone seat, or surface finish has to be checked visually before approval. If you need a broader sense of how design support connects to production, HonHo’s jewelry CAD design guide is a useful reference point.
Preparing CAD Files for Accurate Renders and Production
Rendering only looks easy when the CAD is already clean. If the model has scale errors, missing surfaces, or sloppy intersections, the render can still look polished while the actual sample goes wrong. That’s why the CAD file has to serve two jobs at once, accurate visualization and manufacturable geometry.
What to send and why it matters
Industry guidance recommends supplying files such as STL, OBJ, 3DM, or STEP, along with top, side, and front dimensions, because even a 0.5 mm deviation can materially distort prong spacing, stone seat geometry, or band proportions in the final render (The Jewel Teller). Jewelry is too small for guesswork. A render of a ring that’s slightly off in scale can look believable at a glance and still fail when the sample is checked against the actual spec.
Real-world units matter as well. Industry guidance says jewelry should be modeled in millimeters, and a 1-carat diamond is about 6.5 mm across (FacetForms). That size reference keeps refraction, stone spacing, and proportions believable in the image and consistent in production.
Common mistakes that slow approval
Sloppy CAD usually breaks in the same few places. Surfaces intersect, caps are missing, prongs are too thin, or a stone seat is drawn in a way that can’t hold the gem cleanly. Those problems are visible in polished metal and transparent stones, so they’re harder to hide than in many other product categories.
Practical rule: if the CAD can’t support a real sample, it probably can’t support a trustworthy render either.
For buyers who want a production-minded workflow, the key is to treat the render as a preview of the sample, not as a separate art file. That’s also why many OEM and ODM teams prefer a manufacturer that can move quickly from CAD to sample. A short CAD turnaround keeps the approval cycle moving instead of letting a design sit unfinished for days.
Render Settings for Metals, Stones, and Plated Finishes

Jewelry is hard to render because the materials behave differently from most other products. Polished metals act like mirrors, and gemstones are highly refractive, so the image is driven less by surface color and more by the way light moves through the scene. That’s why lighting and environment usually matter more than the texture map alone.
Why lighting comes first
Expert tutorials recommend high-contrast HDRI environments with neutral lights, and for diamond-heavy scenes they advise render settings such as 20 to 30 max bounces and 300 to 500+ power clamp to preserve caustics and sparkle without unstable fireflies or blown highlights (Light Tracer). Those settings aren’t decoration. They’re part of how the stone keeps its brilliance and the metal keeps its clean reflection edge.
That same logic applies to plated and finished surfaces buyers order. Mirror polish, brushed, satin, sandblasted, hammered, micro-sandblasting, and selective plating all need different material responses. The render should show what the customer is likely to receive, not an idealized version that hides the finish.
How render settings relate to real finishes
HonHo’s production capabilities include vacuum PVD and electroplating in gold, rose gold, silver, black rhodium, and vintage finishes, with in-house PVD thickness adjustable from 0.03 to 0.1 microns and electroplating adjustable from 0.03 microns up to 5 microns. Those thickness ranges matter because coating behavior changes how the final piece wears and how the finish should be previewed in a render. For buyers reviewing plated collections, that connection is the bridge between the digital image and the delivered sample. See HonHo’s gold plating thickness guide for a closer look at finish planning.
| Finish Type | Lighting Strategy | Key Render Parameters | Typical Output Use |
|---|---|---|---|
| Mirror polish | Strong contrast, clean reflections | Sharp highlights, controlled bounce | Hero images and premium catalog shots |
| Brushed | Softer side light | Directional grain visibility | Detail pages and material proofing |
| Satin | Diffused studio lighting | Controlled sheen, reduced glare | Collection pages and line sheets |
| Sandblasted | Even light with close inspection angles | Low-glare surface reveal | Finish comparison and approval |
| Hammered | Side light to catch texture peaks | Strong relief visibility | Lifestyle visuals and close-ups |
| Selective plating | Neutral setup to separate metals | Material contrast and edge definition | Sample approval and factory review |
The right render does not make every finish look dramatic. It makes each finish look honest enough for the buyer to approve it with confidence.
Integrating Renders With HonHo’s CAD, Sampling, and Production Pipeline
A render helps most when it sits inside the production flow, not in a marketing folder by itself. For OEM and ODM buyers, the handoff usually follows a clear order. CAD is built first, the render is reviewed and approved, the sample is produced, and the bulk run is checked against the same visual and dimensional references.
HonHo’s workflow is set up for that handoff. The in-house design team can turn around CAD in 1 to 2 days, sampling usually takes 7 to 20 days including mold building and pre-production verification, and typical production runs 25 to 35 days. Those time bands matter because they show where rendering saves effort. A good render catches avoidable changes before tooling starts, and that is where small misunderstandings can turn into expensive corrections.
Where the render sits in the pipeline
The render is the approval piece before the sample is made. After the sample is approved, the same design intent guides plating thickness, finishing, and the final quality checks. Private label and wholesale jewelry depend on that consistency, because repeated orders have to match the approved look, not drift away from it.
HonHo combines 100 percent inspection with documented defect rates below 0.5 percent, plus a two-year plating color retention warranty under normal wear. In practice, that means the render, the sample, and the QC standard all point to the same finished target. The image is not treated as decoration. It becomes part of the reference set the team uses to judge the work at each stage.
Security matters too
Brands often hold back unreleased concepts until they are confident about handling. Secure file control therefore matters as much as speed. NDA workflows, encrypted transfers, and restricted access belong in a professional production setup, especially when a collection is still under wraps.
For buyers comparing OEM and ODM options, the useful question is simple. Can the supplier take a render and carry it into the mold room, the plating line, and the inspection table without losing the original design intent? HonHo’s custom jewelry 3D design page shows one way a manufacturer can organize that handoff in one system.
Timelines, Cost Drivers, and What to Ask Before You Start
A buyer usually feels the schedule pressure after the first brief comes back with missing measurements or unclear plating notes. That is why the earliest render request should read like a production handoff, not a mood board. If the CAD is clean, the render stage moves faster, the sample team has fewer questions, and the production line can follow the same intent later.
Cost follows how much the studio has to resolve, not just how many files you send. A plain ring with one hero angle is a different job from a collection that needs several stone sizes, plated variants, and lifestyle scenes. Every extra variable means more setup, more review time, and more chances for revision before the design is ready for sampling.
One useful benchmark comes from studios that build large catalog workflows. Some render pipelines can generate large sets of 4K renders across many SKUs, and a WebGL-based workflow can produce images quickly once the model is prepared (Chasing Illusions). The point is not that every vendor should match that speed. The point is that the base CAD file becomes the asset that feeds many outputs, from approval views to finish variants, which is why a single good model often becomes cheaper per image as the range grows.
Main cost drivers buyers should expect
- Number of views: More angles help when the setting height, clasp, or gallery needs to be shown clearly.
- Finish complexity: Mirror polish is easier to present than mixed textures or selective plating.
- Stone setup: Pavé, halos, and multi-stone arrangements take more time to light and review.
- Output type: AR, animation, and turntable assets require more production than a still image.
- Revision rounds: Each correction is cheaper before the sample stage than after it.
A practical buyer checklist should start with the handoff details. Ask which CAD formats the supplier accepts, how many review rounds are included, who owns the final source files, and whether physical samples are quoted separately from render work. If the project is headed into OEM or ODM production, ask how the render will connect to plating thickness, finish specifications, and QC references so the approved look does not get lost between departments.
For buyers trying to plan a project around process instead of a single image quote, HonHo’s custom jewelry cost guide is a useful starting point.
Best Practices and Common Questions About 3D Jewelry Rendering
The easiest way to avoid delays is to brief the render like a production job. Use real-world units, send dimensions with every CAD file, and specify the same metal and plating finish you expect on the sample. If you want a collection to feel coherent, keep the material library consistent across styles so gold tone, stone brightness, and surface sheen don’t drift from one SKU to the next.
Short answers buyers ask most often
How many views does a product page need?
Usually more than one. A front-three-quarter hero view helps sell the piece, but side and top views often matter when a clasp, gallery, setting height, or stone profile needs to be understood.
Can renders replace product photos?
Not always. Renders are strong for pre-launch sales, approval, and catalog consistency, while photography is still useful for showing the final physical piece. Many brands use both.
How should plating be specified in the brief?
Name the finish clearly, such as gold, rose gold, silver, black rhodium, or vintage, and include any special surface requirement like mirror polish or satin. If the supplier supports plating thickness control, include that in the production note too.
How do teams keep designs confidential?
Use NDA terms, limit file access, and keep transfers controlled. That matters most before the sample is approved, when the concept is still unreleased.
Good habit: don’t ask for “a render.” Ask for the specific views, finishes, and approval purpose you need.
A render works best when it sits inside the same chain as CAD, sampling, and QC. That’s the point where jewelry buyers stop guessing and start approving with confidence.
If you’re planning a custom line, private label collection, or wholesale assortment, HonHo Jewelry can support the process from CAD and rendering through sampling, plating, and QC. Visit HonHo Jewelry to discuss your design files, finish specs, and production timeline with a team that works inside the same OEM and ODM flow described above.
Surgical Steel vs Sterling Silver: Buyer Guide
You’re pricing a new collection, and the sample tray is already split down the middle.
How to Gold Plated Jewelry the Right Way for Lasting Color
You probably have a launch already in motion, a supplier sample on your desk, and
What Is a Shank on a Ring: Guide to Design & Durability
You’re refining a ring design, the stone looks right, the setting is approved, and the