
Safety First Before Cleaning Copper Jewelry
Check What Type of Copper Bracelet You Have
Before you grab the lemon or vinegar, identify your bracelet:
- Pure copper bracelet
- Solid color all the way through.
- Edges and inside look the same as the outside.
- Safe for most natural ways to clean copper (lemon, vinegar, baking soda, etc.).
- Copper-plated bracelet
- A thin copper layer over another metal.
- Often more “orange shiny” and very even in tone.
- Do NOT scrub hard or soak in strong acids — you can remove the copper layer.
- Lacquered or clear-coated copper
- Surface looks very shiny and doesn’t darken evenly.
- Water may bead on the surface.
- Avoid harsh cleaners; use only mild soap and water, then dry well.
When NOT to Use Acidic Methods
Skip lemon, vinegar, ketchup, or any acidic homemade copper cleaner if your bracelet has:
- Gemstones or crystals (including magnetic inserts with glued stones)
- Turquoise, opal, pearl, or porous stones
- Enamel details or painted designs
- A patina or antique finish you love (that “aged” dark look)
These materials can etch, fade, or lift in acid. In those cases, use only a soft cloth, mild soap, and water, keeping chemicals away from the sensitive parts.
Always Do a Patch Test First
To avoid surprises, test before you commit:
- Choose a hidden area (inside of the cuff or near the clasp).
- Apply a tiny amount of your chosen cleaner with a cotton swab.
- Wait 1–2 minutes, then rinse and dry.
- Check the metal:
- If it looks cleaner and brighter, you’re good to go.
- If it looks blotchy, dull, or pitted, stop immediately and switch to a gentler method.
A quick patch test protects your HonHo copper bracelet from damage and helps you pick the safest, most effective cleaning method for your specific piece.
5 Best Ways to Clean a Copper Bracelet (Ranked by Speed & Effectiveness)
When I clean copper bracelets (including our HonHo copper pieces), I stick to simple, proven methods. Below are the 5 best ways to clean a copper bracelet, ranked by speed and how well they work.
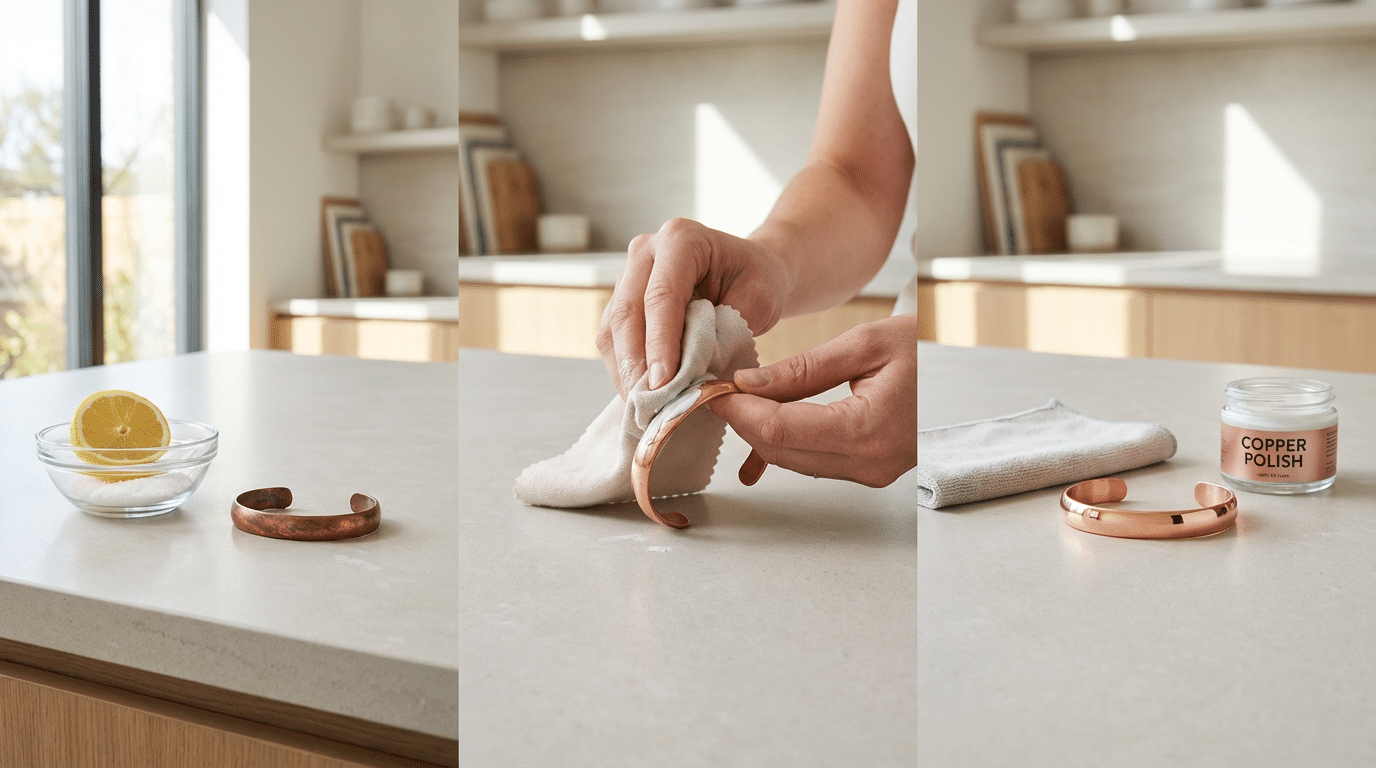
Method 1 – Lemon Juice + Salt (Fastest, 2–3 Minutes)
Best for: Light to moderate tarnish, quick clean before wearing.
You’ll need:
- 1 fresh lemon (or bottled lemon juice)
- Fine table salt
- Soft cloth or sponge
- Mild soap and water for rinsing
- Microfiber cloth for drying
Steps:
- Cut the lemon and squeeze juice into a small bowl.
- Add 1–2 teaspoons of salt and stir until it dissolves.
- Dip a soft cloth in the mix and rub the bracelet in small circular motions.
- Rinse well with lukewarm soapy water.
- Dry completely with a clean microfiber cloth.
Pros:
- Very fast (2–3 minutes).
- Natural and cheap.
- Great for “clean tarnished copper jewelry” at home.
Cons:
- Slightly abrasive if you scrub too hard.
- Not ideal for copper-plated or lacquered pieces.
Before/After:
Expect dull, brownish copper to shift to a warm, rose-gold shine with most tarnish removed.
Method 2 – Ketchup Copper Cleaning Hack
Best for: Everyday tarnish, “lazy” cleaning with stuff in the fridge.
You’ll need:
- Regular ketchup (no chunks)
- Soft toothbrush or cloth
- Mild soap and water
- Microfiber cloth
Steps:
- Apply a thin layer of ketchup over the copper bracelet.
- Let it sit 5–10 minutes.
- Gently rub with a soft toothbrush or cloth.
- Rinse thoroughly with soapy water to remove all residue.
- Dry and buff with a microfiber cloth.
Pros:
- Easy “ketchup copper cleaning hack” anyone can try.
- Mild and safe for most plain copper bracelets.
Cons:
- Slower than lemon + salt.
- Smell and sticky texture aren’t for everyone.
Before/After:
Good at lifting light oxidation and restoring a soft shine, though not always a full mirror finish.
Method 3 – Vinegar + Salt Soak
Best for: Heavier tarnish, darker oxidation, “copper bracelet turned black”.
You’ll need:
- White vinegar
- Salt
- Small glass or plastic bowl
- Soft cloth or toothbrush
- Soap and water
- Microfiber cloth
Steps:
- Mix 1 cup vinegar with 1 tablespoon salt. Stir to dissolve.
- Place the copper bracelet in the solution and soak 5–15 minutes.
- Check often; once the tarnish softens, gently scrub with a toothbrush.
- Rinse well with soapy water.
- Dry and buff thoroughly.
Pros:
- Powerful for tough oxidation and blackened copper.
- Great “natural way to clean copper” without harsh chemicals.
Cons:
- Strong smell.
- Too much soaking can slightly dull very soft or thin copper plating.
Before/After:
Expect big improvement on badly tarnished or black bracelets, usually back to a strong, bright copper tone.
Method 4 – Baking Soda + Lemon Paste
Best for: Controlled cleaning when you want a bit of polishing power.
You’ll need:
- Baking soda
- Lemon juice
- Small bowl and spoon
- Soft cloth or toothbrush
- Soap and water
- Microfiber cloth
Steps:
- Mix baking soda with lemon juice to form a thick paste.
- Apply the paste to the bracelet with a cloth or brush.
- Massage gently in circles, focusing on darker areas.
- Leave on 2–3 minutes if needed, then rinse with soapy water.
- Dry and buff.
Pros:
- More control than a liquid soak.
- Good for “remove oxidation from copper” without commercial chemicals.
Cons:
- Abrasive if you scrub too aggressively.
- Not for pieces with delicate coatings or soft stones.
Before/After:
Removes stubborn spots and gives a nice, even clean that’s close to a polish, ready for a final shine.
Method 5 – Commercial Copper Cleaner (Brasso, Bar Keepers Friend, etc.)
Best for: Quick, strong results and “polish copper to mirror finish” when you don’t mind a store-bought product.
You’ll need:
- Commercial copper cleaner or metal polish
- Soft cloths (one for applying, one for buffing)
- Gloves (recommended)
- Water and mild soap (if instructions say to rinse)
Steps:
- Read the label carefully and check it’s safe for copper jewelry.
- Apply a small amount of cleaner to a soft cloth.
- Rub the bracelet in light circular motions until tarnish lifts.
- Wipe off residue and rinse if instructed.
- Dry and buff to a high shine.
Pros:
- Strong, fast, and consistent.
- Best option for a mirror finish with minimal effort.
Cons:
- Not as “natural” as homemade copper cleaners.
- Some products aren’t suitable for magnetic inserts or stones—always check.
Before/After:
You can usually take a dull, flat bracelet to a bright, almost mirror-polished finish in a few minutes.
If you’re building a small lineup of copper bracelets for your brand or store, consistent finishes matter as much as cleaning. That’s why I work with specialized jewelry suppliers; if you’re scaling up, a professional partner like our own team at HonHo or other experienced jewelry suppliers for custom copper pieces can help you get durable, high-quality copper that’s easier to clean and polish long-term.
How to Polish a Copper Bracelet to a Mirror Shine (After Cleaning)

Once your copper bracelet is clean and dry, polishing is where the real “wow” happens. Here’s how I do it step by step.
Tools You’ll Need
- Microfiber cloth (or other soft, lint‑free cloth)
- DIY polishing paste:
- 1 part flour
- 1 part fine salt
- Enough white vinegar to make a thick paste
- OR jeweler’s rouge cloth / commercial copper polish (a good option if you already use pro products for other jewelry)
Step‑by‑Step: Polish Copper to a Mirror Finish
- Make the polishing paste
- Mix flour + salt in a small bowl.
- Add vinegar slowly until it becomes a smooth, spreadable paste (not runny).
- Apply a thin, even layer
- Use your fingers or a soft cloth to coat the copper bracelet.
- Avoid magnets, stones, or any non‑copper parts if it’s a copper magnetic bracelet.
- Let it sit for 5–10 minutes
- This gives the paste time to break down stubborn oxidation and micro‑tarnish.
- Buff in small circles
- With a clean, dry microfiber cloth, buff the bracelet in tight circular motions with light pressure.
- Rotate the bracelet so you hit every curve and edge.
- Wipe and check the shine
- Wipe off any remaining paste with a damp cloth, then dry completely.
- If you want more shine, repeat the buffing once more with a fresh cloth.
- Optional: Jeweler’s rouge or pro polish
- For a true “mirror” or almost rose‑gold glow, finish with a jeweler’s rouge cloth or a thin layer of a specialized copper polish.
- Always follow the product instructions and avoid getting polish on any coatings or stones.
If you’re deep into finishes and surface work, you’ll probably like how we break down polishing in our guide on how polishing and plating define modern jewelry.
Rose‑Gold High Shine vs. Antique Satin Look
You can control the final look just by how you buff:
- Rose‑gold high shine (mirror finish)
- Use very soft microfiber or a polishing cloth.
- Long, continuous circular motions, light but consistent pressure.
- Keep going until you can see clear reflections in the copper.
- Finish with a clean, dry cloth to remove all residue.
- Antique satin / brushed look
- After cleaning, skip the heavy polishing pastes.
- Lightly buff with a soft cloth only, minimal pressure.
- Move in one direction (not circles) for a subtle brushed effect.
- Stop as soon as the surface looks even but not shiny—this keeps that antique vibe while still looking cared for.
No matter which finish you choose, always end by making sure the bracelet is completely dry. Any leftover moisture will bring tarnish back faster and undo your polishing work.
How to Remove Green Stains from Skin Caused by Copper

If your copper bracelet leaves green marks (verdigris) on your skin, don’t stress—it’s normal oxidation, not an allergy in most cases, and it’s easy to fix.
Quick ways to remove green stains from skin
Use any of these simple options:
- Soap and warm water
- Wash the area with mild soap and warm water.
- Gently rub with your fingers or a soft washcloth.
- Rinse and dry well. Most stains fade in under a minute.
- Lemon juice or vinegar wipe
- Dab a cotton pad in diluted lemon juice or white vinegar (50% water, 50% acid).
- Gently rub the stained skin in circles.
- Rinse with water and moisturize so your skin doesn’t dry out.
- Baking soda paste
- Mix baking soda + a few drops of water into a soft paste.
- Massage onto the green area, then rinse thoroughly.
- This is great if the stain is stubborn after a long day of wear.
How to stop green marks from showing up
You don’t have to give up your copper bracelet to avoid green stains. Try:
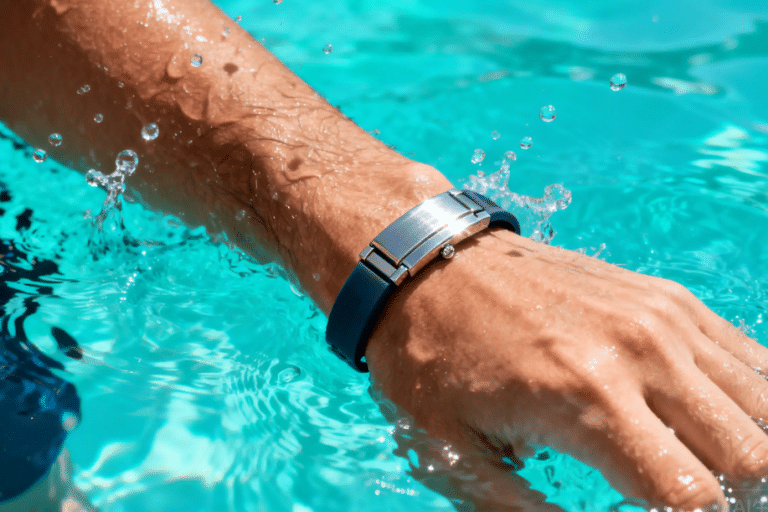
- Keep skin dry – Sweat + copper = faster oxidation. Take the bracelet off for workouts, hot tubs, saunas, and long showers.
- Barrier layer on skin – Apply a thin layer of clear lotion or petroleum jelly on the wrist before wearing.
- Seal the metal – A very light coat of clear nail polish or jewelry-safe clear coat on the inside of the bracelet slows down tarnish and contact with skin.
- Clean the bracelet regularly – Wipe it down after wear to remove sweat and oils so it doesn’t build up verdigris.
Green marks don’t mean your copper bracelet is fake or ruined—it’s just a sign that real copper is reacting with air and moisture. With basic copper jewelry care tips and fast cleanup, you can keep both your skin and your bracelet looking fresh.
Long-Term Care: Keep Your HonHo Jewelry Copper Bracelet Shiny

Keeping a copper bracelet bright isn’t hard if you build a simple routine around how you wear, store, and protect it.
Daily wearing tips
- Put your copper bracelet on last (after lotion, perfume, sunscreen, and makeup).
- Take it off before:
- Swimming (chlorine and saltwater speed up tarnish)
- Showering or washing dishes
- Heavy workouts (sweat + friction = faster oxidation)
- After wearing, wipe it quickly with a soft microfiber cloth to remove sweat, oils, and moisture.
- If you have multiple pieces, mix copper with 316L stainless steel jewelry or other metals to reduce friction and scratches on the copper itself. You can see how we handle durable metals like stainless in our HonHo 316L jewelry collection.
Proper storage (anti-tarnish setup)
When you’re not wearing your HonHo copper bracelet, store it like this:
- Keep it dry and separate from other jewelry to avoid scratches.
- Use:
- Anti-tarnish bags or pouches
- A small zip bag with most of the air squeezed out
- Silica gel packs in your jewelry box to control humidity
- Avoid storing in bathrooms or near windows where moisture fluctuates.
Extra protection: clear coat or wax
If you want to slow down tarnish and green marks on skin:
- Renaissance wax (or high-quality microcrystalline wax):
- Apply a very thin layer with a soft cloth, buff lightly.
- Keeps the “natural copper” look but adds a barrier against moisture and skin contact.
- Clear lacquer / jewelry clear coat spray:
- Best for people who hate polishing or react to copper.
- Makes the shine last longer but slightly “seals” the metal, so direct copper–skin contact is reduced.
- Any coating will wear off over time on contact points; you may need to reapply every few months depending on use.
How often to clean your copper bracelet
Frequency depends on how often and where you wear it:
- Daily wear (all day, most days):
- Quick wipe: after every wear
- Light clean: every 1–2 weeks
- Deep clean + polish: every 1–2 months
- Occasional wear (a few times a month):
- Quick wipe: after wearing
- Deep clean + polish: every 2–3 months
- Collection / gift / display pieces:
- Store in anti-tarnish packaging
- Inspect and clean lightly every 3–6 months
If you’re building your own line or sourcing custom copper pieces, it’s smart to define clear care instructions for your customers from day one. That’s exactly how we approach finishes and long-term wear when we design and manufacture jewelry in our own HonHo ODM jewelry projects.
Common Mistakes to Avoid When Cleaning a Copper Bracelet

When you clean a copper bracelet, the wrong product or tool can wreck the finish in seconds. Here’s what I never use on copper and why.
1. Never Use Bleach or Harsh Chemicals
Avoid:
- Bleach or chlorine cleaners
- Strong drain cleaners or oven cleaners
- Ammonia-based heavy-duty products
These can:
- Strip the surface and pit the copper
- React with metals and create toxic fumes
- Permanently dull the shine and damage any magnets or inserts
Stick to mild, natural ways to clean copper (lemon, salt, vinegar, baking soda, or a trusted commercial copper polish) instead.
2. Skip Toothpaste with Abrasives
Most toothpaste has:
- Silica and other abrasives that scratch metal
- Whitening particles that are too rough for jewelry
On a copper bracelet, that means:
- Fine hairline scratches that catch dirt and tarnish faster
- Losing that smooth, polished look you want
If you want a gentle scrub, use a soft cloth or soft toothbrush with a proper homemade copper cleaner instead of toothpaste.
3. No Steel Wool, Scouring Pads, or Hard Brushes
Don’t use:
- Steel wool
- Green kitchen scouring pads
- Wire brushes
These tools are way too aggressive for jewelry. They can:
- Leave deep, visible scratches
- Remove protective coatings or patina you might want to keep
- Make future polishing harder because the surface is no longer smooth
Go with:
- Microfiber cloth
- Soft cotton cloth
- Very soft toothbrush for crevices
4. Don’t Over-Scrub or Press Too Hard
Even with the right cleaner, you can still do damage if you’re too rough:
- Heavy pressure can flatten edges and wear down details
- Over-scrubbing can strip any intentional antique patina
- Repeated aggressive cleaning can thin a copper-plated layer
Better approach:
- Use light to medium pressure in small circles
- Let the cleaner do the work, not brute force
- Rinse, check progress, then repeat gently if needed
5. Avoid Mixing Random Products
Mixing cleaners “just to see what happens” is risky:
- Vinegar + bleach, or similar combos, can create dangerous fumes
- Unknown reactions can discolor or darken your copper bracelet
Use one method at a time, rinse well, and dry completely before trying a different product.
Handled right, your copper bracelet will stay smooth and easy to polish, instead of turning into a scratched, dull piece you can’t rescue.
FAQ: Cleaning and Caring for Your Copper Bracelet
Will cleaning remove the health benefits of copper?
No. Cleaning only removes surface tarnish, sweat, oils, and dirt. It doesn’t change the metal itself.
If you believe in the potential benefits of copper, gently polishing it keeps more copper in contact with your skin, which actually supports that purpose. Just avoid harsh grinding or sanding that removes a lot of metal.
Can I clean a copper bracelet with magnets or turquoise stones?
Yes, but you need non‑acidic, gentle methods:
- Avoid: lemon, vinegar, ketchup, strong acids, long soaks
- Use instead:
- Mild dish soap + warm water + soft cloth
- A soft toothbrush for crevices
- A very mild baking soda paste (test first on a tiny area)
Magnets are usually fine with light cleaning. Turquoise and other porous stones can be damaged by acids and harsh chemicals, so keep the cleaning focused on the copper areas only.
My copper bracelet turned black — is it ruined?
Not at all. A copper bracelet turning black just means heavy oxidation, not damage.
- Use a stronger but safe method like lemon and salt or a commercial copper cleaner
- Rinse and dry thoroughly
- Polish with a soft microfiber cloth to bring back the shine
If you want a deeper guide, I’ve broken down safe methods and aftercare in this full copper jewelry cleaning and care guide.
How do I restore antique patina if I want the aged look?
If you’ve cleaned your bracelet too bright and want that antique, vintage patina back, you can:
- Let it darken naturally by wearing it daily and skipping polish for a while
- Lightly clean only fingerprints and dirt, not all the tarnish
- Focus polishing only on raised edges and leave the darker color in the grooves for an “antique” contrast
If you’re buying new, I often recommend keeping one copper bracelet high‑shine and one with patina, so you can swap depending on the look you want.

What Is White Gold? The Complete Guide to This Popular Jewelry Metal
White gold’s brilliant rhodium-plated finish closely resembles platinum — at a fraction of the cost.
Is Stainless Steel Waterproof? The Complete Truth (2026 Guide)
Short answer: Yes — not that simple though. This implies that, while stainless steel is
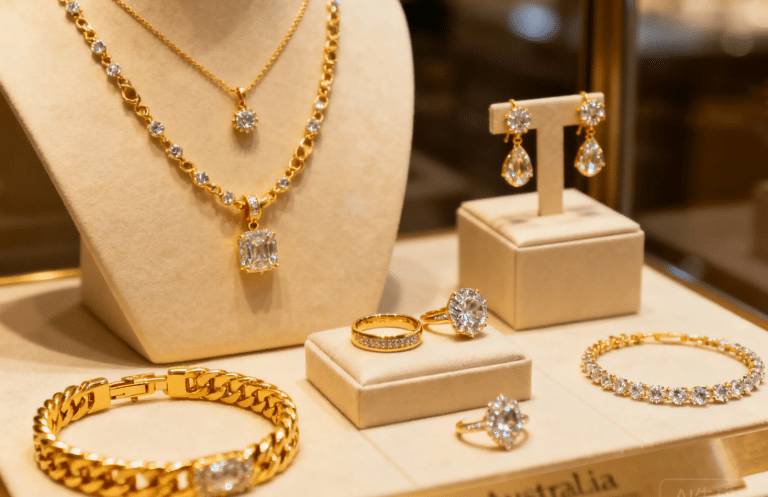
Top 15 Australian Jewellery Brands Worth Buying in 2026
Top 15 Australian Jewellery Brands Worth Buying in 2026 If you’ve been thinking of updating