

Every piece you wear daily slowly takes a beating. Rings scrape against desks, bracelets rub on keyboards, necklaces collect skin oils and pollution. Over time you see:
- Fine scratches that make metal look cloudy
- Tarnish on silver and some gold alloys
- Dull, flat surfaces where there used to be sharp reflections
That’s where jewelry polishing techniques come in.
Polishing vs Cleaning: The Real Difference
People mix these up all the time, but they’re not the same:
- Cleaning = removes dirt, oils, lotions, and surface grime
- Tools: soap, water, soft brushes, non abrasive jewelry cleaner
- Result: looks fresher, but scratches and wear are still visible
- Polishing / buffing = reshapes the surface on a microscopic level
- Tools: polishing compounds (rouge, tripoli), buffing wheels and mops, polishing cloths
- Result: scratch removal, smoother metal, mirror finish jewelry, restored shine
In short: cleaning makes jewelry “not dirty”; polishing makes it look new again.
How Polishing Protects Value
Done right, the right jewelry buffing methods do more than just make pieces pretty:
- Restores the original luster and color of gold, silver, and platinum
- Reduces visible wear and tear, helping the piece look younger for longer
- Supports resale and appraisal value, especially for fine gold and diamond jewelry
- Keeps surfaces smooth so they resist tarnish and grime buildup better
Proper gold jewelry polishing techniques and silver tarnish removal can literally buy your pieces more years of wear.
When to Polish vs When to Just Clean
You don’t want to polish every time you wash your hands. Over-polishing can slowly thin metal. As a rule of thumb:
Just clean when:
- The jewelry looks dull or dirty, but no major scratches
- You see makeup, oils, or soap film on the surface
- You’re dealing with soft or porous stones (pearls, opals, turquoise)
Consider polishing when:
- You see visible scratches or scuffs on metal
- Silver shows streaky, stubborn tarnish that cleaning can’t lift
- The piece has lost its mirror finish and looks gray or flat
If you’re unsure, start with a gentle clean first. If it still looks tired, that’s when the right jewelry polishing techniques and tools come into play.
Essential Jewelry Polishing Tools and Materials
When you understand the core jewelry polishing techniques, you don’t need a huge workshop to get pro-level results. Here’s the short list of what actually works and when to use it.
Basic home tools
These are enough for most DIY jewelry polishing and daily care:
- Microfiber cloths – Non-abrasive, perfect for quick wipe-downs and removing fingerprints. Safe on most metals and diamonds.
- Polishing cloths – Treated with mild polishing compounds for gold and silver tarnish removal. Great for a fast shine without machines.
- Soft brushes (baby toothbrush or makeup brush) – Help lift dirt from prongs, engravings, and pavé settings without scratching.
Must-have polishing compounds
If you’re serious about jewelry buffing methods, a few basic compounds go a long way:
- Rouge (red rouge) – Classic finishing compound for mirror finish jewelry, especially gold and soft metals.
- Tripoli – Slightly more aggressive; ideal for how to remove scratches from jewelry before final polishing.
- Other colors (white, green, blue) are tuned for stainless steel, platinum, and harder metals.
Always keep each compound on its own buffing wheel to avoid contamination.
Rotary tools and buffing wheels
For advanced rotary tool polishing (think Dremel):
- Felt wheels & mops – Used with rouge or tripoli for controlled polishing on small areas.
- Cotton buffing wheels – Great for larger surfaces, chains, bangles.
- Use low to medium speed and light pressure to avoid overheating stones or over-polishing metal.
If you work a lot with stainless steel or want production-level finishes, partnering with experienced stainless steel jewelry manufacturers can save you a ton of polishing time.
Emery papers, burnishers, detail tools
For scratch removal and fine detail work:
- Emery papers / sanding papers (various grits)
- 600–1000 grit: light scratches
- 1200–2000+ grit: pre-polish, smoothing before buffing
- Burnishers – Hardened steel tools that compress metal instead of removing it, perfect for edges and tightening small surface flaws.
- Needle files, rubber wheels, and silicone polishers – Let you shape and smooth tight spots, prongs, and engraved areas.
Ultrasonic cleaners and tumblers
These don’t polish on their own, but they support every jewelry maintenance guide:
- Ultrasonic jewelry cleaner – Uses vibration to remove dirt and oils from chains, settings, and under stones. Great before polishing, but avoid on porous gemstones (opal, turquoise, pearls).
- Rotary or vibratory tumblers – Ideal for tumbling jewelry polish on many small pieces at once with steel shot. They burnish the surface for a smooth, even shine.
Choosing the right tools for metals and gems
Match your polishing tools to the material:
- Gold jewelry polishing techniques
- Use red rouge on soft buffs
- Avoid aggressive grits unless you’re fixing visible scratches
- Silver jewelry polishing techniques
- Use anti-tarnish polishing cloths or mild compounds
- Tripoli for deeper marks, then rouge to finish
- Platinum & stainless steel
- Harder metals need finer grits and dedicated compounds (white/green)
- Gemstone-safe polishing
- Diamonds: safe with most polishing, but avoid hitting prongs too hard
- Colored stones: avoid heat and harsh chemicals
- Pearls, opals, porous stones: no ultrasonic, no abrasive compounds—just soft cloth and non abrasive jewelry cleaner
If you deal with gold-plated stock in bulk, check trusted gold-plated jewelry manufacturers like Honho’s gold plated jewelry line and keep polishing extremely light to avoid cutting through the plating.
Prep Steps Before You Polish Jewelry

Getting jewelry polishing techniques right starts before you touch a cloth or compound. Here’s how I prep every piece so I don’t damage metal or stones.
1. Inspect for Loose Stones and Weak Settings
Before any polishing or buffing:
- Check prongs and settings: Gently tap the jewelry next to your ear and listen for rattling. If a stone moves, stop.
- Look for cracks or thin areas: Use a loupe or phone camera zoom to spot hairline cracks, worn prongs, or bent claws.
- Avoid polishing damaged pieces: Anything with loose stones, cracks, or weak settings should go to a pro jeweler first. High-speed buffing can launch stones across the room.
This matters even more with complex pieces or items from larger production hubs like jewelry factories in Thailand, where micro-pavé and fine settings are common.
2. Pre-Clean With Mild Soap and Warm Water
Never polish over dirt, lotion, or old compound:
- Mix a few drops of mild dish soap in warm (not hot) water.
- Soak for 5–10 minutes.
- Use a soft toothbrush to gently clean behind stones and in crevices.
- Rinse well and pat dry with a lint-free or microfiber cloth.
This quick home jewelry cleaning step helps your polishing compounds work better and avoids rubbing grit into the metal.
3. What to Avoid on Delicate or Porous Gemstones
Some stones are fragile and don’t like chemicals, heat, or harsh abrasion:
- Delicate / porous stones: opals, pearls, turquoise, coral, malachite, lapis lazuli, emerald (often oil-treated).
- Avoid:
- Hot water or sudden temperature changes
- Ultrasonic or steam cleaners
- Ammonia, alcohol, vinegar, bleach
- Abrasive pastes or stiff brushes
For these, stick to barely warm water, a tiny bit of mild soap, and a super-soft cloth only.
4. Progressive Sanding and Scratch Removal
For metal-only areas (no pearls, soft stones, or plating nearby) and deeper scratches:
- Work in stages from coarse to fine grit:
- Deep scratches: 600–800 grit emery paper
- Refining: 1000–1500 grit
- Pre-polish: 2000+ grit or fine sanding pads
- Always sand in one direction, then switch direction with the next finer grit so you can see when the previous scratches are gone.
- Keep pressure light to avoid removing too much metal, especially on gold and thin bands.
Think of this as shaping the surface so your final jewelry buffing methods can give a clean mirror finish.
5. Test on Hidden Spots First
Before going all-in with a new compound or tool:
- Choose a discreet area: inside a ring shank, back of a pendant, or clasp side.
- Test your polishing compound, cloth, or Dremel / rotary tool setup on that spot.
- Check:
- Does the metal get too hot?
- Does the finish look too matte or too shiny?
- Is plating thinning or color changing?
If the test area looks good, you’re safe to continue. If not, adjust your jewelry polishing technique—or hand it off to a professional.
Home Jewelry Polishing Techniques

Quick shine with polishing cloths & manual buffing
For fast, safe results, a quality jewelry polishing cloth is your best friend. I always recommend:
- Use the treated side of the cloth for tarnish and fine scratches.
- Buff in small, straight strokes, not wild circles (that’s how swirl marks start).
- Finish with the clean side of a microfiber cloth to remove leftover compound and get that mirror finish jewelry look.
Keep a polishing cloth near where you store your daily pieces. A 10-second buff every few wears is better than a big, harsh clean once a year.
Safe DIY cleaning mixes (soap, water, gentle options)
If you want DIY jewelry polishing without risk, stay simple:
- Mix a few drops of mild dish soap with warm (not hot) water.
- Soak for 5–10 minutes, then brush gently with a soft toothbrush.
- Rinse well and dry fully with a microfiber cloth before polishing.
This non abrasive jewelry cleaner setup is usually safe for gold, platinum, diamonds, and most sturdy gemstones.
Using baking soda & pastes (when to avoid)
Baking soda can help with silver tarnish removal, but it’s still an abrasive. I only use it when:
- The piece is solid silver (not plated) and has no soft stones (like opals or pearls).
- Tarnish is heavy and a regular polishing cloth isn’t enough.
Basic method:
- Make a thin paste (baking soda + water).
- Rub gently with your fingers or a soft cloth, not a brush.
- Rinse and dry thoroughly, then buff.
Avoid baking soda on: plated jewelry, antique finishes, pearls, opals, turquoise, or any soft/porous stones.
Gentle hand polishing for plated, vintage & delicate jewelry
Plated, vintage, and heirloom pieces need extra-soft jewelry buffing methods:
- Use only a clean microfiber or jewelry polishing cloth, no compounds.
- Light pressure only; you’re shining the surface, not “scrubbing it clean.”
- For gold-filled or plated jewelry (like many pieces we produce that are similar in structure to gold filled jewelry), avoid abrasive cleaners completely or you’ll thin the plating.
For antique jewelry, a gentle clean and light buff is usually enough. If you’re unsure, stop and hand it to a pro.
At-home routines to keep everyday pieces bright
A simple jewelry maintenance guide you can follow at home:
- Weekly: quick soap-and-water clean, soft brush, rinse, dry, light polish cloth buff.
- After heavy wear (gym, beach, sunscreen): clean the same day to prevent build-up.
- Storage: keep pieces dry, in separate soft pouches or boxes to avoid scratches.
With consistent, gentle care, you’ll rarely need aggressive jewelry scratch removal methods—and your everyday pieces will stay bright with minimal effort.
Professional Jewelry Polishing Techniques
When I talk about professional jewelry polishing techniques, I’m really talking about control. The goal is to remove just enough metal to restore shine and shape, without thinning pieces or softening details.
Buffing with Motors, Felt Wheels, and Mops
In a workshop, I use a polishing motor with different wheels depending on the job:
- Felt wheels for focused, controlled cutting and scratch removal
- Cotton or muslin mops for general buffing and final shine
- Mini wheels on a rotary tool (Dremel) for small areas and tight corners
Speed and pressure stay low and steady. Too much pressure = heat, rounded edges, and lost detail.
Using Polishing Compounds for a Mirror Finish
To get a true mirror finish on jewelry, I move through compounds in stages:
- Tripoli or similar cutting compounds: remove fine scratches and tool marks
- Rouge (red, green, or white): refine and bring out that high-polish gloss, especially for gold and silver
Each wheel stays dedicated to a single compound so I don’t contaminate the finish. For example, I’ll keep one mop only for gold polishing compounds and another for silver.
Tumbling and Barrel Polishing for Multiple Pieces
For batches of chains, charms, or bracelets, I use tumbling and barrel polishing:
- Steel shot + burnishing liquid: great for hard metals and mass finishing
- Best for sturdy items like bangles, bracelets and charms in bulk, and cast pieces
Tumbling doesn’t give the same precision as hand buffing, but it’s efficient for overall shine, edge smoothing, and jewelry buffing at scale.
Burnishing Techniques for Smooth Surfaces
Burnishing doesn’t remove much metal; it compresses and smooths it:
- Steel tools or tumbling with steel shot push the surface flat and shiny
- Ideal for refreshing worn edges, smoothing small pits, and tightening the surface before final polish
It’s one of my go-tos when I want strength and shine without aggressive cutting.
Advanced Wheel Work for Fine Details
With detailed or engraved jewelry, I switch to small abrasive wheels and points:
- Rubberized abrasives (fine grits) for controlled scratch removal
- Bristle brushes for cleaning and light polishing in deep patterns
- Tiny felt points with rouge for sharp corners and pavé areas
This kind of jewelry scratch removal is slow on purpose – it preserves engraving, milgrain, and micro details that define high-end pieces.
Satin, Matte, and High-Polish Finishes
Not every piece needs a mirror finish. I design finishes to match the style and market:
- Satin finish: fine abrasive pads or wheels for a soft directional grain
- Matte finish: slightly coarser abrasives or bead blasting for a modern, low-glare look
- High-polish finish: full compound progression to a bright, reflective surface
On mixed-finish jewelry, I’ll mask or protect certain zones so the satin vs high-polish contrast stays clean and intentional, especially on premium or custom-made pieces from our own jewelry supplier workshop (https://www.honhojewelry.com/jewelry-supplier/).
Polishing Techniques by Jewelry Material

When it comes to jewelry polishing techniques, the material matters more than anything. Use the same method on every piece and you’ll scratch stones, strip plating, or thin out the metal. Here’s how I handle each type safely.
Gold polishing techniques (avoid metal loss)
Gold is soft, so over-polishing literally wears it away.
- Use a non-abrasive polishing cloth or very fine compound (red rouge) for surface shine.
- For light scratches, go progressive: ultra-fine emery (2000+ grit), then a soft buffing wheel with rouge.
- Avoid aggressive wheels or heavy pressure – especially on lightweight chains, hollow pieces, and engraved areas.
- For high-value or custom gold pieces (especially from quality makers like the ones in this list of top companies that make custom jewelry), I always lean toward gentler polishing and more frequent cleaning instead of heavy buffing.
Silver polishing techniques and tarnish control
Sterling silver loves to tarnish, but it also polishes up fast.
- For everyday care, use a silver polishing cloth (pre-loaded with silver-safe compound).
- For heavy tarnish, use a silver cream or foam, rinse well, and dry with a microfiber cloth.
- Avoid harsh abrasives and baking soda scrubs on high-polish silver – they can leave swirl marks.
- Store silver in anti-tarnish bags or pouches to slow down tarnish and reduce how often you need deep polishing.
Polishing platinum, stainless steel, and harder metals
Harder metals need more effort – and the right polishing compound.
- Platinum: very tough, but shows wear as a soft “patina.” Use harder compounds and more steps (coarse → fine), but avoid grinding edges and prongs.
- Stainless steel & titanium: use abrasive wheels or papers in stages, then a final polish with a stainless-specific compound.
- Always polish in consistent directions to avoid visible cross-scratches and streaks.
Gemstone-safe polishing for diamonds and colored stones
Never treat gemstones like metal.
- Diamonds: very hard, but can chip; keep them away from spinning wheels’ edges. Polish metal around the stone, not the stone itself, unless you’re a trained setter.
- Hard colored stones (sapphire, ruby, spinel): usually safe with ultrasonic cleaners and gentle brushing, but avoid buffing wheels touching stone facets.
- Avoid heat build-up: long polishing runs can shock or crack some gems.
Special care for pearls, opals, and soft stones
Soft or porous stones need zero abrasives.
- Pearls: only wipe with a soft damp cloth; no ultrasonic, no steam, no polishing compounds.
- Opals, turquoise, malachite, lapis, coral: avoid chemicals, hot water, and mechanical polishing. Gentle cleaning only (mild soap, water, soft cloth).
- Never soak porous stones; they can absorb liquids and discolor or weaken.
Handling plated, antique, and heirloom jewelry
With these, preserving what’s there is more important than making it ultra shiny.
- Plated jewelry: use non-abrasive jewelry cleaners and a soft cloth only. Over-polishing removes plating and exposes base metal.
- Antique and heirloom pieces: the patina is often part of the value. Clean gently, avoid aggressive buffing, and don’t “chase” every scratch.
- Intricate vintage settings, old-cut stones, or mixed materials are usually better handled by a professional jewelry finishing service to avoid damage.
Use the right jewelry buffing methods for each material, and you’ll keep your pieces looking sharp without shortening their lifespan.
Common Jewelry Polishing Mistakes to Avoid
Even with the best jewelry polishing techniques, a few small mistakes can ruin a piece fast. Here’s what I always watch out for:
Over‑polishing and thinning the metal
Polishing actually removes metal. If you go too hard or too often, you can:
- Thin out ring shanks and bracelet edges
- Soft‑round prongs so stones get loose
- Erase hallmarks and engravings
Rule: Aim for “refresh,” not “rebuild.” Light passes, not aggressive grinding.
Using the wrong compound, wheel, or grit
Not every polishing compound works on every metal. For example:
- Harsh cutting compounds on gold = fast metal loss
- Wrong wheel (too hard or too coarse) = deep, new scratches
- Using aggressive grits on plated jewelry = plating gone
Always match compound + wheel + metal. If I’m working with stainless steel pieces similar to those in our wholesale stainless steel rings collection, I use harder wheels and appropriate stainless compounds, never soft gold compounds.
Mixing compounds and contaminating buffing tools
One of the most common polishing mistakes:
- Using the same buff for tripoli and rouge
- Switching between compounds without cleaning the wheel
This causes:
- Random scratches instead of a mirror finish
- Dirty, cloudy surfaces
Fix: Dedicate each wheel/mop to a single compound and label them.
Polishing stones like metal
Gemstone-safe polishing is different from metal work. Mistakes include:
- Hitting soft stones (opal, turquoise, pearls) with metal buffs
- Running diamonds and colored stones against dirty wheels
- Using harsh compounds that can scratch or burn stones
Rule: Protect gems with tape or shields, or remove them before heavy polishing. Never treat stones like metal.
Skipping cleaning before polishing
Polishing over dust, skin oils, and grit just grinds the dirt into the surface. That means:
- New scratches
- Uneven shine
- Stubborn residue in details
Always do a thorough clean first (mild soap, warm water, soft brush, or ultrasonic jewelry cleaner if it’s safe for the piece).
Rushing and creating swirl marks
Going too fast or using messy motions leads to:
- Swirl marks under bright light
- Uneven reflection, especially on flat surfaces
- “Hazy” metal instead of a mirror finish
Work with:
- Consistent direction (not random circles)
- Light pressure
- Proper speed on rotary tools or Dremel jewelry polishing setups
If you avoid these mistakes, your DIY jewelry polishing will look much closer to professional jewelry finishing, and you’ll keep each piece stronger and better-looking for longer.
Safety Tips and Best Practices for Jewelry Polishing

When you’re working with jewelry polishing techniques, treat your bench like a mini workshop. A little safety goes a long way in protecting both you and your pieces.
Personal Protective Gear: Eyes, Lungs, and Hands
Always protect yourself before you start:
- Eyes: Use safety glasses or a face shield. Buffing wheels and broken burs can throw sharp debris fast.
- Lungs: Wear a dust mask or respirator when using buffing wheels and mops, sanding, or working with polishing compounds. Fine metal and compound dust is not something you want to breathe in.
- Hands: Use snug-fitting gloves only when safe (never around high-speed rotating tools where they can snag). Otherwise, keep nails short and fingers dry and oil-free for better control.
Ventilation and Dust Control
Good airflow is non‑negotiable for serious jewelry buffing methods:
- Work near an open window or under an extraction fan.
- Use a polishing hood or bench shield to capture dust.
- Vacuum or wipe surfaces often; don’t blow dust around with compressed air.
Securing Small Parts and Avoiding Kickback
Loose jewelry plus a fast motor is a recipe for damage:
- Always hold jewelry firmly with fingers, wooden sticks, or soft-jawed pliers.
- Polish below the center of the wheel so it pushes the piece down, not up into your face.
- Avoid loose sleeves, hair, or jewelry that can catch in the wheel. Tie back long hair before you work.
This is the same care we use in our own professional jewelry manufacturing process, where secure setups prevent both accidents and defects.
Safe Handling of Compounds, Cleaners, and Chemicals
Rouge, tripoli, ultrasonic jewelry cleaners, and other solutions need respect:
- Read labels and follow dilution instructions for all cleaners.
- Never mix cleaners (especially anything with ammonia or bleach).
- Store compounds and chemicals in closed containers, away from kids, pets, and food areas.
- Wear gloves when using strong solutions or long ultrasonic cycles to avoid skin irritation.
Post-Polishing Care and Storage
Once you’ve nailed the mirror finish jewelry look, lock in that shine:
- Wipe off all excess compound with a clean microfiber cloth.
- Rinse with mild soap and warm water if the metal and stones allow it, then dry completely.
- Store pieces separately in soft pouches or lined boxes to prevent fresh scratches.
- Keep silver in anti-tarnish bags or boxes to slow silver tarnish from coming back.
Use these safety habits every time you do DIY jewelry polishing—they’re simple, fast, and they protect both your work and your health.
When to Get Professional Jewelry Polishing
Even with the best DIY jewelry polishing techniques, there’s a point where you should hand pieces over to a professional. Knowing when to stop at home and when to book a polishing service is key if you care about long‑term value and safety.
Signs your jewelry needs a pro instead of DIY
Skip DIY and go straight to a jeweler if you notice:
- Deep scratches or obvious grooves that don’t fade with light buffing
- Dents, bends, or misshapen bands (especially on rings and bangles)
- Loose stones, lifted prongs, or rattling settings
- Cracks in the metal or worn-down claws around gemstones
These are structural problems. Polishing at home won’t fix them and can make the damage worse.
Deep scratches, dents, and structural damage
For serious jewelry scratch removal, a professional will:
- Use graded metal polishing grits and wheels to level deep scratches
- Reshape bent shanks, rebuild worn prongs, or fill pits with solder
- Polish with the right buffing wheels and mops so they don’t remove more metal than needed
Trying to fix this with a Dremel or aggressive compounds at home can thin the metal and shorten the life of the piece.
High-value, antique, or sentimental pieces
If the jewelry is:
- High-value (solid gold, platinum, large diamonds)
- Antique or heirloom pieces with original patina
- Sentimental items you can’t replace
let a pro handle all polishing and finishing. Over‑polishing can erase hallmarks, soften engraving, and kill the vintage character that gives antique jewelry restoration its charm. For example, if you own marked 925 silver, it’s worth understanding what “925 Italy” on silver jewelry actually means before anyone touches it with a wheel.
Complex designs, pavé settings, and intricate details
Pieces with:
- Pavé or micro‑pavé stones
- Milgrain edges, filigree, or deep engraving
- Hidden galleries or detailed under‑settings
are very easy to damage with DIY rotary tool polishing. A professional uses small precision buffs, burnishing techniques, and controlled pressure to:
- Clean and polish around stones without dislodging them
- Protect sharp detail and not “melt” the design with heavy buffing
What to expect from professional jewelry finishing services
A solid professional jewelry finishing service usually includes:
- Inspection: checking prongs, clasps, solder joints, and stone security
- Deep cleaning: ultrasonic jewelry cleaner and/or steam cleaning
- Targeted scratch removal: sanding, wheel work, or burnishing
- Finish options: high-polish mirror finish, satin finish, or a mix
- Final check and polish: making sure stones are tight, surfaces are even, and the piece looks new
If you’re already investing in custom-designed pieces or high-quality silver and gold, it’s worth using professional polishing regularly to protect both the look and the long-term value of your collection.
FAQs on Jewelry Polishing Techniques
How often should I polish different types of jewelry?
- Everyday gold / stainless steel: Light polish every 3–6 months, deep pro polish once a year.
- Silver jewelry: Wipe with a polishing cloth weekly; full polish when tarnish won’t come off with a cloth.
- Plated jewelry: Only when it looks dull, and very gently – over-polishing will remove the plating.
- Diamonds & hard stones: Clean often, polish only when metal looks scratched or cloudy.
If you wear stacks every day, you’ll need polishing more often because of friction between pieces.
What’s the best cloth or compound for gold and silver?
- Cloth:
- Gold: Soft microfiber or treated jewelry polishing cloth (non-abrasive).
- Silver: Anti-tarnish silver polishing cloth with a mild compound built in.
- Compounds:
- Gold: Red rouge (jeweler’s rouge) for a mirror finish, used lightly.
- Silver: Tripoli for scratch removal, then rouge for final shine.
For stainless steel and other fashion pieces, I usually recommend a softer approach like a microfiber cloth rather than aggressive compounds.
Is polishing safe for diamonds and gemstones?
- Safe with care: Diamonds, sapphires, rubies are tough but the metal around them is not.
- High‑risk stones: Opals, pearls, turquoise, emeralds, moonstone, and other soft or porous stones can be ruined by harsh polishing, heat, or ultrasonic cleaning.
- Rule of thumb:
- Never treat pearls or opals like metal.
- Avoid strong chemicals and abrasive pastes on any gemstone.
When in doubt, let a pro handle gemstone jewelry, especially antique or pavé pieces.
Can I polish jewelry at home without special tools?
Yes, for most everyday pieces:
- Use mild soap + warm water + soft brush to clean.
- Dry fully, then buff with a microfiber or jewelry polishing cloth.
- Avoid DIY methods like toothpaste or harsh baking soda scrubs on delicate, plated, or soft stones.
A simple at-home jewelry polishing kit plus a few non-abrasive cloths is usually enough for casual wear pieces.
How to keep jewelry shiny longer after polishing?
- Remove jewelry before showering, working out, swimming, or using cleaners and perfumes.
- Store pieces separately in soft pouches or lined boxes to avoid scratch-on-scratch contact.
- For silver, use anti-tarnish bags or strips.
- Give your pieces a quick wipe after each wear to remove sweat, lotion, and sunscreen.
If you’re building a rotation of durable pieces like stainless steel bracelets or everyday chains, choosing low‑maintenance metals from the start helps keep that fresh, polished look with much less work.
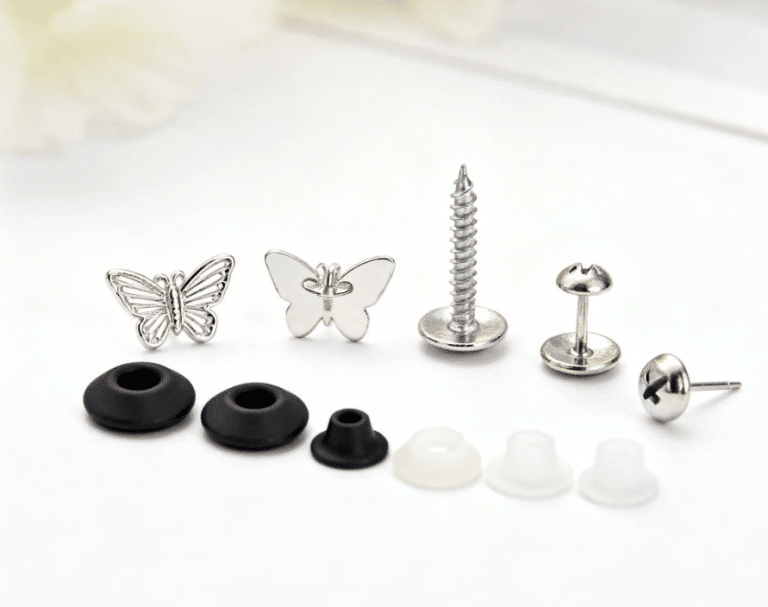
The Unseen Hero: Why Earring Backings Define Quality Jewelry
Every jewelry brand owner knows the sinking feeling. A customer calls, distraught. They’ve lost one
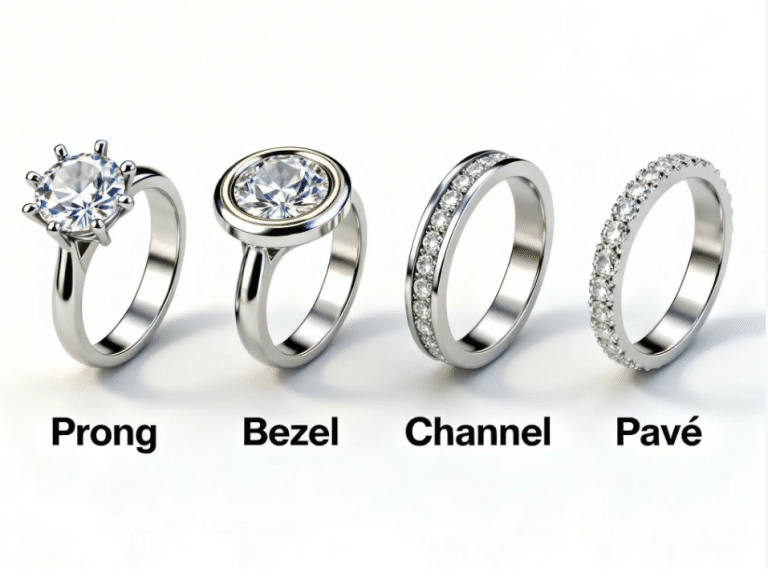
Choosing the Best Jewelry Stone Setting for Mass Production
Selecting the right jewelry stone setting is one of the most pivotal decisions for any
Best Jewelry Stone Setting for Mass Production | HonHo
Choosing the best jewelry stone setting Choosing the best jewelry stone setting is one of