
Key Takeaways
- Lost wax casting is an ancient investment casting process still used today to produce highly detailed metal objects for art, industry, and jewelry.
- Because the final metal follows the original wax model exactly, the method delivers unmatched surface detail and complex geometry — ideal for custom jewelry, sculptures, and precision parts.
- Every stage — from carving or 3D-printing a wax model to pouring molten metal — depends on the right wax, investment mix, tooling, and careful temperature control to reduce defects.
- Modern digital design and 3D printing speed up pattern creation and improve repeatability, while good quality control and safety practices keep makers and the environment protected.
Lost Wax Casting is an investment casting process that starts with a detailed wax model, builds a refractory mold around it, melts the wax out, and pours molten metal into the resulting cavity. The result: an accurate metal reproduction of the original wax design.
You’ll find lost wax and wax casting techniques used across jewelry, sculpture, dental restorations, and precision manufacturing. Shops commonly cast metals such as bronze, gold, and stainless steel — choosing the alloy that best suits strength, finish, and wear requirements. Read on for the main steps, tools, and modern applications that make this process so versatile.
What is Lost Wax Casting?
lost wax manufacturing process
Lost wax casting (often called investment casting) turns a precise wax model into a metal part by creating a refractory mold around the model, melting the wax out, and pouring molten metal into the resulting cavity. Because the metal occupies the exact shape of the wax, the technique reproduces fine surface detail and complex geometry that other casting methods can’t match.
This technique dates back millennia and remains widely used today in fine art, jewelry, dental work, and precision manufacturing. Because it works with many metals — from bronze to gold to stainless steel — lost wax and wax casting give designers and engineers the flexibility to choose alloys for color, strength, and wear resistance.
Below is a concise, scannable walkthrough of the core steps — keep these anchors handy so you can jump to the detailed section later:
- Modeling: create the wax model (hand-carved, molded, or 3D-printed).
- Investing: attach sprues and coat with a refractory investment to form the mold.
- Burnout: use a kiln to melt and remove all wax, leaving a clean cavity.
- Casting: pour properly heated molten metal into the mold.
- Breakout & Finishing: remove the shell, cut sprues, file, and polish the final piece.
Each step affects the final cast — the wax model defines surface detail, the investment quality controls thermal shock resistance, and the molten metal’s temperature and pour technique determine fill and porosity. For safety, always wear appropriate PPE at the burnout and casting stages and follow kiln and furnace manufacturer instructions.
1. Defining This Timeless Technique
Start with a precise wax model — whether carved by hand or printed from a CAD file. The model is attached to a gating system (sprues) and then invested (coated) in a ceramic or plaster slurry. After the investment hardens, the mold is heated in a kiln to burn out the wax, leaving a cavity that mirrors the model exactly; molten metal poured into that cavity becomes the cast piece.
2. A Quick Look Back: History
Archaeological finds show lost wax casting in Bronze Age cultures — from South Asia to Mesopotamia and Africa — where craftsmen used wax patterns and bronze pours for tools and statuettes. The method spread across the ancient world because it reliably reproduced fine detail and repeatable forms.
3. Why It Still Matters Today
Because the process reproduces intricate textures and thin features, artists use it for detailed sculptures and jewelers rely on it for rings, pendants, and other custom pieces. In industry, lost wax casting enables manufacture of components with tight tolerances in metals like stainless steel and brass.
4. The Basic Steps Explained Simply

- Modeling: carve or 3D print a wax model — this defines final detail and surface texture.
- Investing: attach sprues and coat the model in investment to build a strong mold.
- Burnout: use a kiln to remove wax completely (no residue) and to preheat the mold for casting.
- Casting: pour molten metal, controlling temperature to avoid porosity and ensure complete fill.
- Breakout & Finishing: remove the shell, cut sprues, file, polish, and apply protective coatings as needed.
Tip: make sure the burnout removes all traces of wax — trapped wax or residue can cause steam, cracking, or surface flaws when the molten metal is introduced.
These steps require steady hands, precise timing, and the right tools: carving knives for wax, an investment flask, a kiln for burnout, and safe casting gear for handling hot metal. Later sections expand on materials, equipment, and best practices for avoiding common defects.
Essential Tools and Materials
Whether you’re in a small studio or a production shop, every step of the wax casting technique depends on consistent materials and the right tools. Below are practical choices and trade-offs to help you pick waxes, investments, alloys, and equipment that fit your project and budget.
Choosing the Right Wax Type
Waxes come in many formulations — carving wax, injection wax, microcrystalline blends, and castable resins used for 3D printing. Carving waxes are good for one-off, hand-detailed pieces; injection wax is efficient for duplicate patterns; microcrystalline waxes are tacky and forgiving; and castable 3D resins let you convert CAD files directly into patterns. Choose softer waxes for bulk fills and harder, high-detail waxes or resins for crisp edges on rings and small jewelry.
Quick guideline: verify the wax melt point for your workflow — low-melt wax may deform during handling or burnout. When using 3D-printed castable resins, follow printer and resin maker recommendations for post-processing to avoid residue that can cause casting defects.
Investment Mixes: What Works Best
Investment powders (plaster, silica blends, commercial mixes like Kerr Satin Cast 20 or Ultra-Vest) form the refractory shell that becomes the mold. The right investment provides fine surface texture, low expansion, and resistance to thermal shock during the burnout and casting cycle. For best results, mix to the manufacturer’s ratios, degas the slurry in a vacuum pot if possible, and apply multiple thin coats to avoid weak spots.
Tip: vacuum-mixing and pressure pots reduce trapped air and surface flaws. Consider silica content and investment expansion when casting high-temperature alloys.
Selecting Your Metal Alloy
Alloy choice shapes appearance, strength, and required casting temperatures. Gold and silver are standard for fine jewelry; bronze and brass are favored for sculpture and decorative objects; stainless steel and specialized alloys serve industrial parts. Match the alloy’s pour temperature and shrinkage behavior to your investment and mold design to avoid crack or fill issues.
Consider final use: softer metals polish more easily but scratch faster; harder alloys require more finishing work but last longer. For production runs, test-cast samples to dial in pour temperature and gating before committing to volume.
Key Equipment You Will Need
- Wax modeling tools and carving knives — for hand detail and finishing
- Investment flasks and mixing bowls — accurate ratios matter
- Kiln or burnout oven — consistent cycles are essential (follow investment maker guidance)
- Crucible, torch, and stirring tools — sized for the metal and batch scale
- Vacuum or pressure pot for degassing and compacting the investment
- Personal protective equipment — heat-resistant gloves, face shield, respirator
- Flux, pickling solutions (citric acid, vinegar) and finishing supplies
A few practical buying tips: a basic hobby kit includes carving tools, a small kiln, and basic investments; a professional setup adds vacuum mixers, larger kilns, crucibles sized to your melt volume, and vacuum casting rigs. Investing in a good vacuum or pressure pot and consistent investments will reduce defects and save time in finishing.
Finally, keep a small test routine: test an investment-to-water ratio on a sample wax, confirm that the kiln burnout leaves no wax residue, and trial-cast a sample to perfect your gating and pour temperature before a full production run.
Modern Tech Meets Old Ways
Lost wax casting is an ancient craft that’s been modernized by digital design and advanced materials. Today’s studios combine CAD, 3D printing, and improved investment mixes to speed pattern production, increase repeatability, and enable far more intricate castings than were practical by hand alone.
Digital design, 3D printing, and new materials don’t replace the core casting method — they make modeling and mold preparation faster and more precise, allowing artisans and manufacturers to push the limits of what can be cast in metal and glass.
3D Printing Your Wax Patterns

3D printing (SLA with castable resin or dedicated wax 3D printers) produces accurate wax models and patterns from CAD files. For small jewelry patterns, prints can often be completed and post-processed within a few hours; larger or higher-resolution batches will take longer. If you don’t own a printer, many shops outsource to service bureaus — a cost-effective path for occasional runs.
Workflow example: CAD design → 3D print castable resin wax model → clean and post-cure → attach sprues → invest and burnout → cast. This short loop accelerates prototyping and reduces lead time for small collections or custom pieces.
Digital Design in Casting
CAD tools let designers create shapes that are difficult or impossible to carve by hand, then iterate quickly. Files drive printers and CNC machines, reducing guesswork in mold making and improving repeatability across multiple wax models.
Combining Speed and Precision
Digital tools shorten the path from idea to cast, but quality still depends on basics: correct wax selection, proper investment mixing, and careful temperature control during burnout and the pour. For most makers, a hybrid approach — hand-finishing 3D-printed patterns — yields the best balance of efficiency and craftsmanship.
Why Choose Lost Wax Casting?
Lost wax casting remains a go-to method because it reliably produces parts with a level of surface detail and complexity that other casting methods struggle to match. From ancient civilizations to modern studios, the process has proven its value for artists and manufacturers who need precision and artistic freedom.
It’s adaptable across scales — ideal for a single custom jewelry piece or a short production run — because tooling costs are lower than creating large permanent molds.
Unmatched Detail and Complexity

Because the final metal fills the exact cavity left by the wax model, lost wax casting reproduces delicate textures, deep undercuts, and thin walls — features prized by jewelers for ornate rings, pendants, and bracelets as well as sculptors creating lifelike bronzes.
Versatility Across Different Metals
Lost wax casting works with a broad range of metals — gold and silver for fine jewelry, bronze and brass for sculpture and decorative objects, and stainless or specialty alloys for functional parts. That flexibility makes it useful for artists and manufacturers who must balance aesthetics, strength, and cost.
For example, jewelers favor 925 silver and gold for finish and value, while HonHo Jewelry and similar manufacturers use stainless steel and brass to produce durable, low-tarnish lines at scale.
Great for Unique, Custom Pieces
This method shines for custom work. Artists can sculpt or 3D print a unique wax model and cast a one-off piece or a short run without investing in large permanent tooling — a major advantage for bespoke rings, signet pieces, and limited collections.
Relatively Low Tooling Costs
Starting a lost wax casting job generally requires lower upfront tooling costs than large permanent molds, making it practical for designers and small studios. For most custom projects, minimum order quantities are smaller and lead times can be reasonable — test a sample run to confirm timing and cost before scaling.
If you’d like a quick quote for a prototype or short production run, consider contacting a specialist or service bureau — they can advise on minimums, lead times, and metal choices to meet your design goals.
Understanding the Limitations
Lost wax casting delivers exceptional detail, but it’s not a one-size-fits-all solution. Recognizing the process’ constraints — time, potential defects, and cost trade-offs — helps you plan realistic schedules, budgets, and expectations for jewellery and industrial work.
It Takes Time and Patience
Every cast consumes time: carving or printing the wax model, building and drying the investment, a controlled burnout in the kiln, and finally pouring and finishing can span several hours to days depending on complexity and batch size. Make sure you schedule extra time for testing, especially when changing alloys or investments.
To be efficient, batch similar models together — that reduces setup time and maximizes kiln and crucible use. But remember: rushing cooling or finishing stages often causes warping, cracks, or stress in the metal.
Potential for Casting Defects
Common defects include porosity, shrinkage, incomplete fills, and surface blemishes. Causes range from trapped gas and low metal temperature to blocked vents, poor investment mixing, or wax residue left in the mold. Quality checks during each step reduce the chance of having to rework or scrap cast pieces.
Make sure you inspect molds after burnout for any wax residue and verify vents and risers are clear — a small omission here can lead to porosity or incomplete fill when you pour molten metal.
Cost Considerations for Production
Lost wax casting has variable costs: materials (waxes, investments, metals), equipment (kiln, vacuum pot, crucible), and labor. For single pieces or short runs it’s cost-effective; for large, simple parts, other methods (die casting, sand casting, or CNC) may be cheaper. Consider outsourcing specialized steps (3D printing, burnout) to control capital expense.
Mastering Casting Quality Control
Quality control prevents wasted time and material. Implement routine checks: verify investment mix and viscosity, confirm burnout cycles, test melt and pour temperatures, and inspect finished pieces for porosity, shrinkage, or surface flaws.
How Material Choices Impact Results
Material choices — wax, investment, and alloy — are interdependent. Using microcrystalline wax often improves handling; selecting the correct investment and mixing it bubble-free prevents weak spots. Make sure your investment’s refractoriness matches the alloy’s pour temperature.
Temperature Control is Crucial
Temperature matters at burnout and at the pour. Melting points differ from optimal pour temperatures — silver melts around 1,763°F, but casting silver often requires higher furnace temperatures to ensure flow. Make sure you use reliable pyrometers and follow alloy supplier recommendations when setting pour temperatures.
Cooling Rates and Metal Structure
Controlled cooling affects grain structure and mechanical properties. Slow, uniform cooling generally reduces internal stress and yields a more ductile metal; quick quenching can increase hardness but may introduce brittleness. Use sand beds or controlled ovens when specific cooling profiles are required.
Advanced Wax Formulations Matter
New wax formulations and castable resins reduce distortion, improve detail, and simplify burnout. When adopting a new wax or resin, run test pieces to confirm burnout behavior and surface finish before full production.
Solving Common Casting Problems
When something goes wrong, systematic troubleshooting is the fastest path to fix it. Change one variable at a time — temperature, venting, investment mix — and record results so you can isolate the root cause.
Identifying Frequent Casting Defects
- Porosity: trapped gas or insufficient pour temperature — try degassing, raising metal temp, or improving venting.
- Shrinkage: poor gating or insufficient feed metal — add risers or adjust gating to feed hotspots.
- Incomplete fill: low pour temp or blocked vents — check crucible temp and clear mold vents.
- Surface flaws: dirty wax or poor burnout — clean patterns and run a full burnout cycle.
Tips for Minimizing Imperfections
Clean work surfaces and tools to avoid contaminants. Degas molten metal before pouring and add flux only after degassing. Trial temperatures in controlled increments (e.g., small increases) to find the best pour point for your alloy and mold combination.
When troubleshooting, change only one variable at a time and record results — over time you’ll build a practical database of what works for your tools, materials, and scale of work.
Safety and Eco-Friendly Practices
Lost wax casting blends art and chemistry — and with that comes real risk if safety and waste aren’t managed. Make sure your studio prioritizes protective gear, clean procedures, and responsible disposal so the craft can thrive without harming people or the environment.
Today many makers combine traditional skills with greener tools and practices — recycled metals, bio-based or reclaimed waxes, and closed-loop water systems — to reduce emissions and waste while maintaining quality.
Essential Safety Gear and Rules

- Heat-resistant gloves
- Face shield or safety goggles
- Fire-resistant apron or clothing
- Closed-toe shoes
- Respirator mask
- Ear protection
Make sure PPE is worn during burnout and casting, and keep a clear, labeled storage area for acids, solvents, and flammable materials. Establish studio rules — no food in the workspace, clear exits, and an accessible fire extinguisher and first-aid kit.
Maintaining Your Casting Equipment
Keep tools and machines clean and well-maintained. Replace filters and check vents for good airflow; repair frayed cords and damaged hoses immediately. A maintained kiln, vacuum pot, and crucible reduce the risk of failure and workplace incidents.
Greener Casting Innovations
Many foundries now use recycled metal, reclaimed or bio-based waxes, and closed-loop water systems to cut emissions and waste. These practices can lower material costs and support sustainable production without compromising quality.
Handling Waste Responsibly
Segregate scrap metal for recycling, store acids and solvents in labeled containers, and locate local hazardous-waste drop-off sites. Make sure staff receive training on proper disposal and reuse opportunities.
Conclusion
Lost wax casting continues to be relevant because it combines precision, artistic freedom, and material versatility. With careful quality control and adherence to safety and eco-friendly practices, it remains a practical choice for artists, jewelers, dental labs, and specialized manufacturers.
If you want help estimating lead times, tooling costs, or environmental options for your next project, get a quote or download our quick-start checklist to plan your first cast.
Frequently Asked Questions
What is the lost wax casting process?
It’s an investment casting method: create a wax model, invest it in a refractory, remove the wax by burnout, then pour molten metal into the cavity to produce a detailed metal part.
What tools do I need for lost wax casting?
Specialty wax, carving tools, sprues, investment powder, a kiln, mixing and vacuum equipment, crucible and pouring tools, and PPE (gloves, face shield, respirator).
Can lost wax casting be used for jewelry?
Yes — jewelers use lost wax casting for rings, pendants, and detailed custom pieces because it reproduces fine textures and small details effectively.
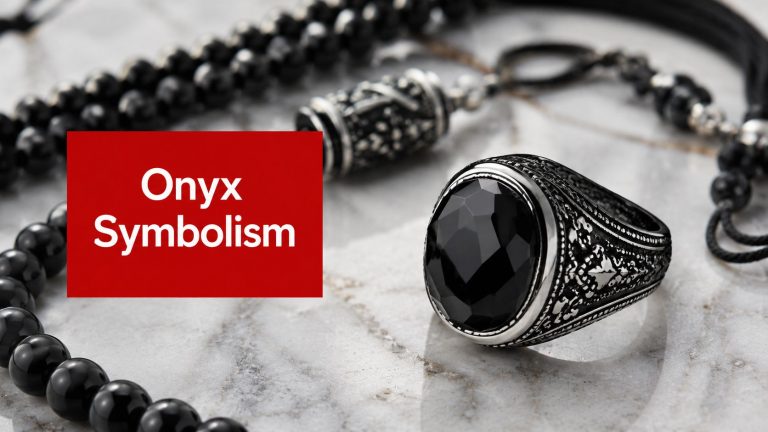
What Does Onyx Symbolize: Meanings, History & Uses
A buyer holds a black onyx ring under the showroom lights and asks the question
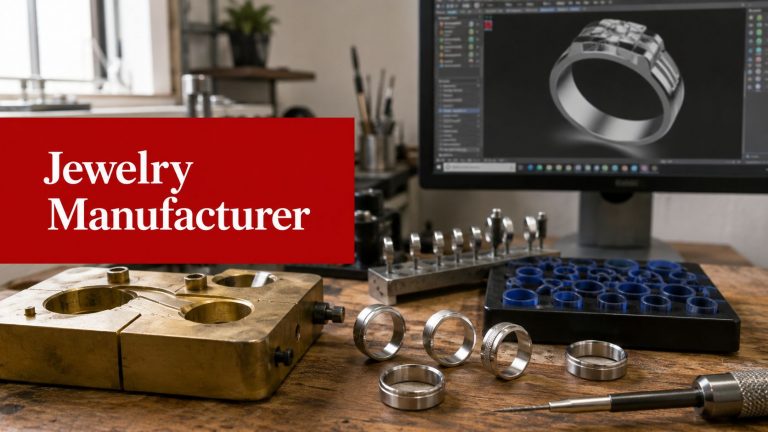
How to Choose a Manufacturer Jewelry Partner
You’ve got the sample in hand, the price looks workable, and the first quote sounds

Private Label Jewelry Manufacturer: Your 2026 Guide
You’re probably at the point where the design looks good on screen, the supplier inbox